A Firewall is an application designed to prevent hacking activities, which can effect a computer, or the entire computer network. It also stops one PC from sending malicious software to other systems.
Here is a quick guide to enabling/disabling Window Software Firewall in Windows 8:
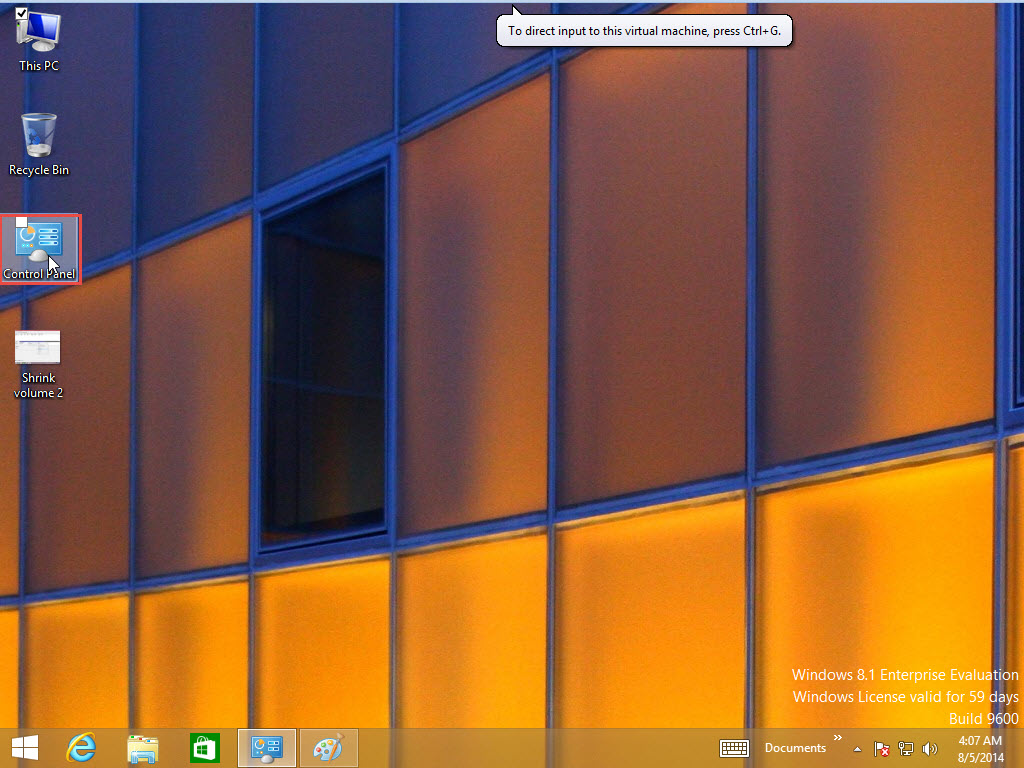
Step 1: Open the “Control Panel.”
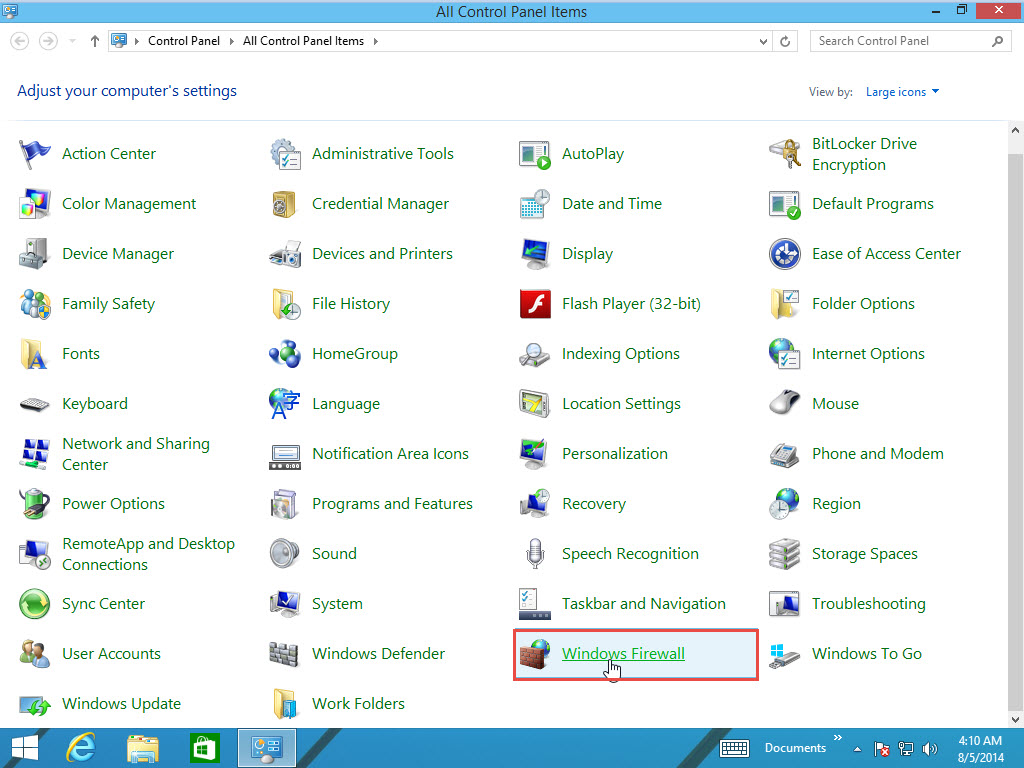
Step 2: Go to the “Windows Firewall” option.
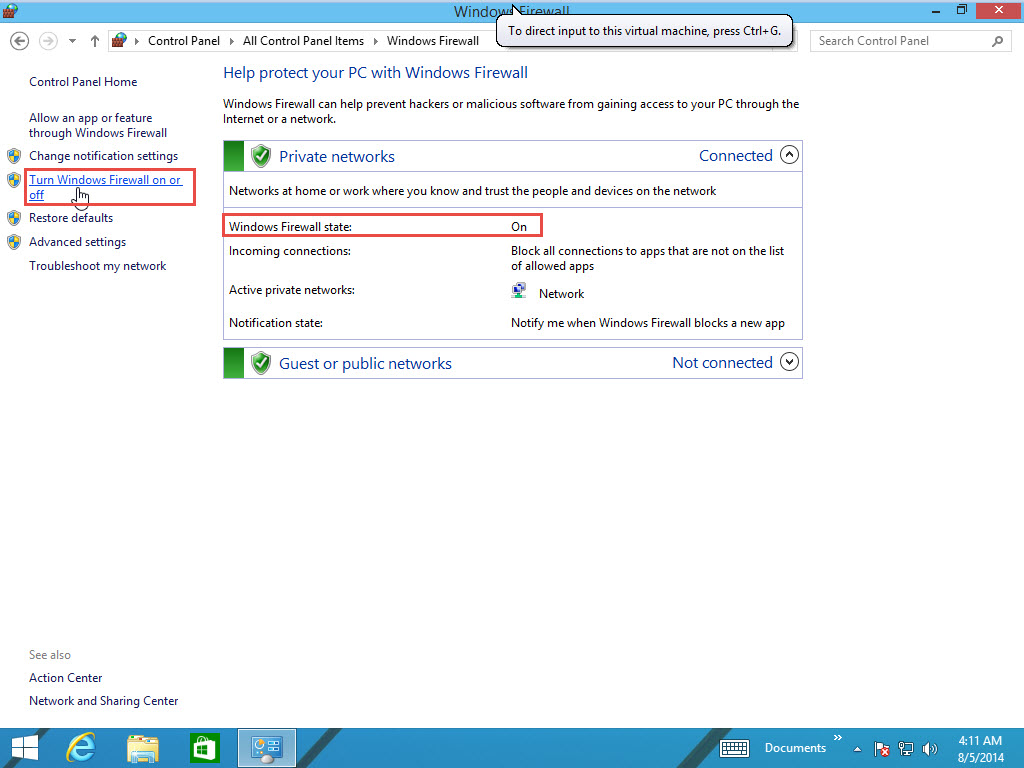
Step 3: Click on the “Turn Windows Firewall On or Off” option.
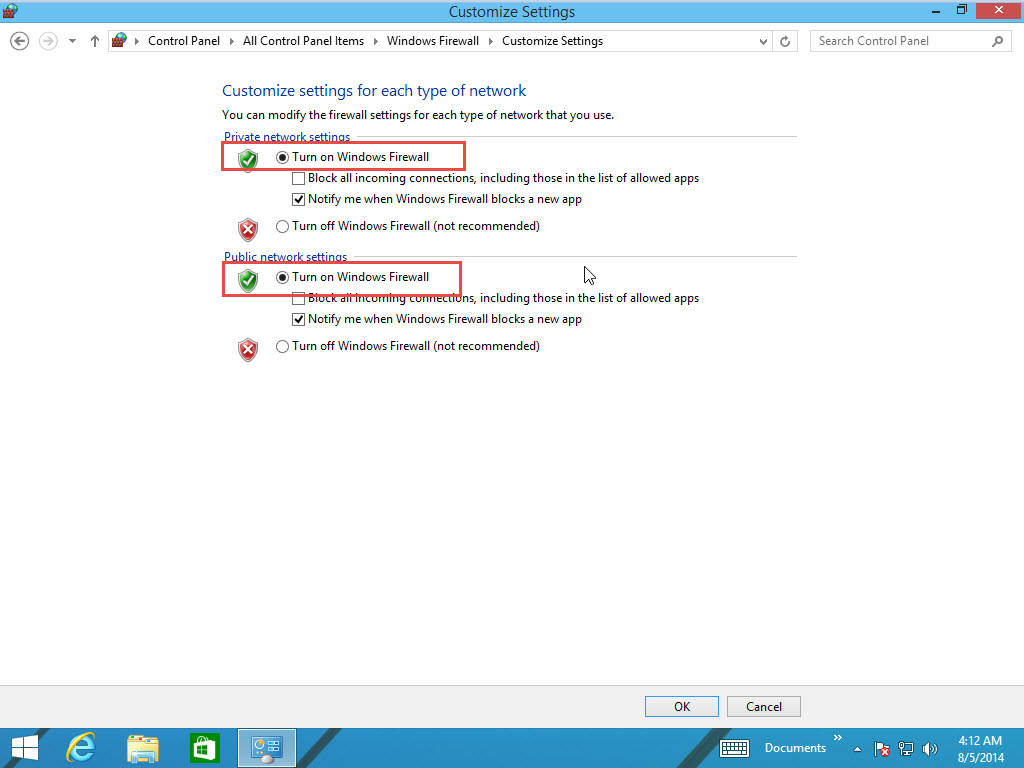
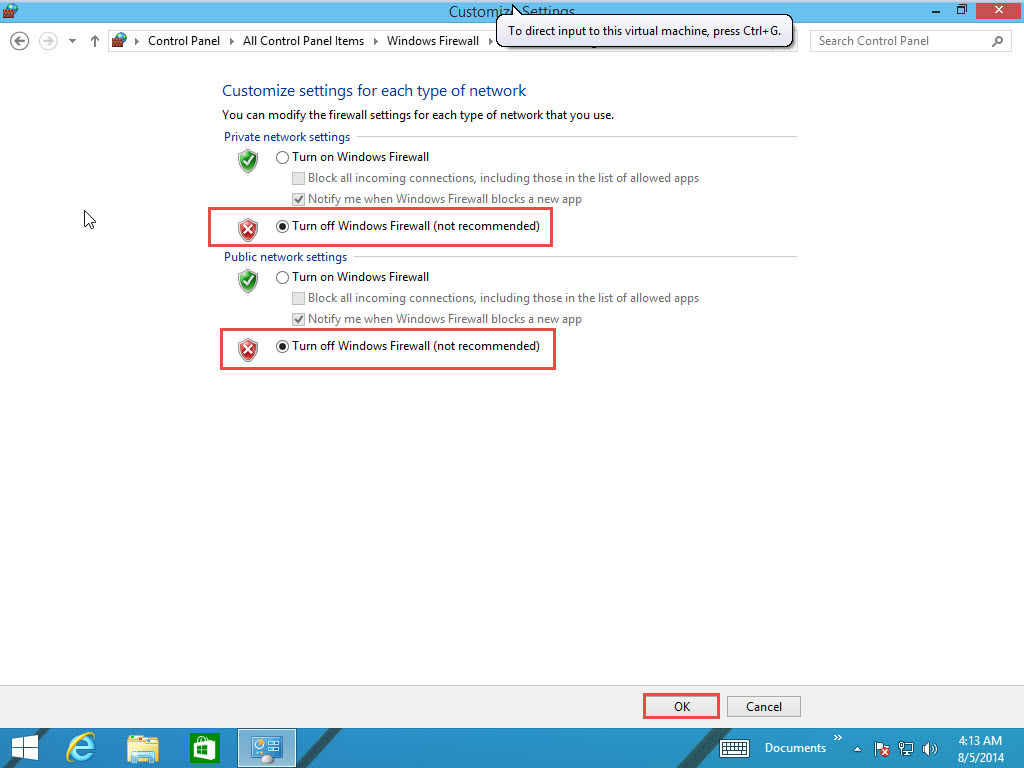
Step 4: As you can see in the screenshot below, the setting is by default set to “Turn on Windows Firewall.”
Step 5: Select the “Turn Off The Windows Firewall” option and click on the “Ok” button to continue.
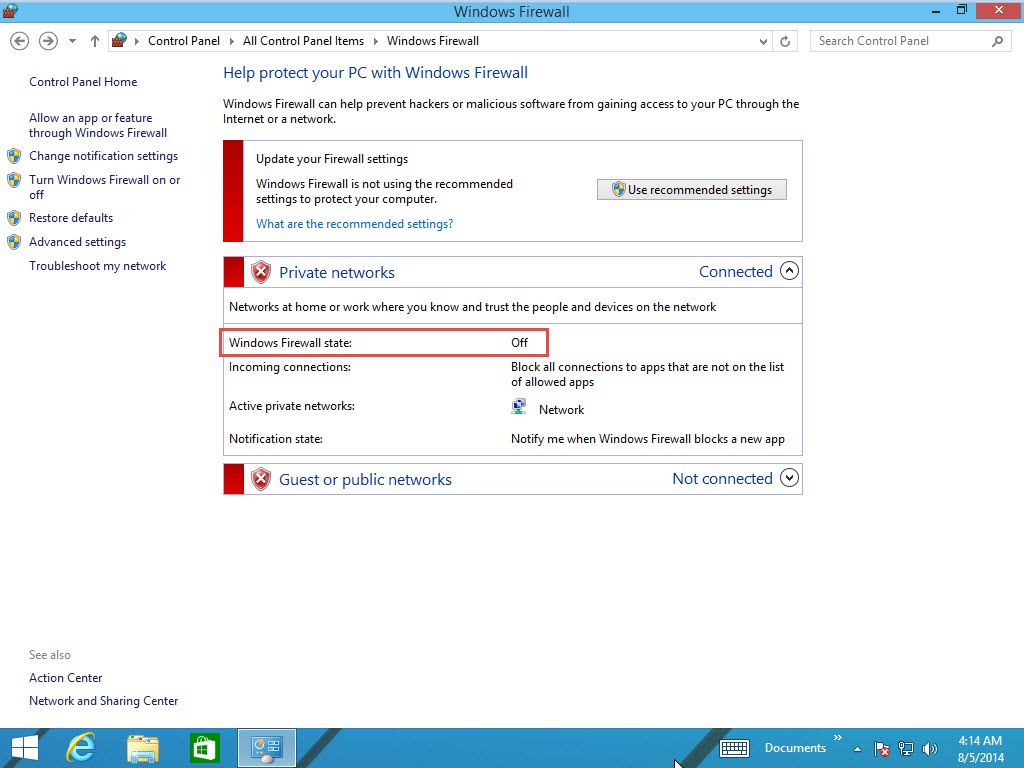
Step 6: As you can see in the screenshot below, the Firewall State is in Off Mode. You can enable it by performing the same process.
If anything remains unclear, drop your queries in the comment section below. Our experts readily participate in discussions to clarify all your doubts.


