The process involves making a Domain Controller by installing Active Directory Services in Windows Server 2008.
You need the following prerequisites for successful installation:
- Domain Controller with Forest functional level of at least Server 2003 or later
- Active Directory Schema Master running in Server 2003 or later
- Domain Controller should have the Exchange Server as a member
- Domain Controller should be a Global Catalogue Server
- Microsoft Filter Pack must be installed
- Windows Remote Management 2.0
- Microsoft .NET Framework 3.5
- Windows PowerShell V2
- Internet Information Services (IIS) 7.0
- Microsoft Management Console 3.0
Here are some short and simple steps to install Microsoft Exchange Server 2010.
Take a look:
Step 1: Insert the Exchange Server Installation Disk into CD-ROM. You can also extract ISO file of Exchange Server 2010 into one of the drives.
Here, the first thing is to extract Active Directory Schema and install RSAT-ADDS tool PowerShell. Once installed, open PowerShell and type the following commands:
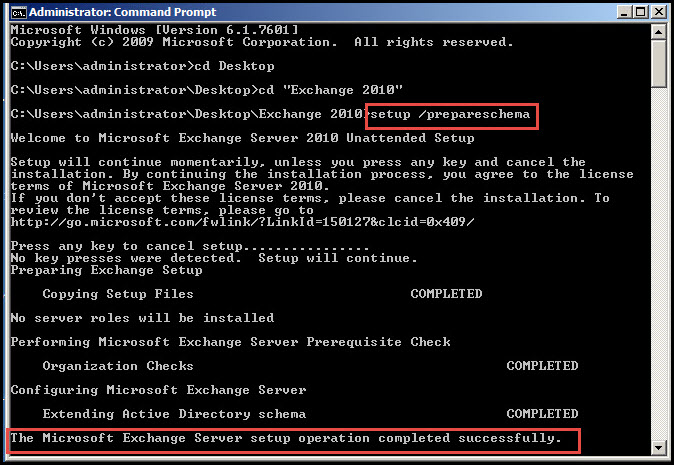
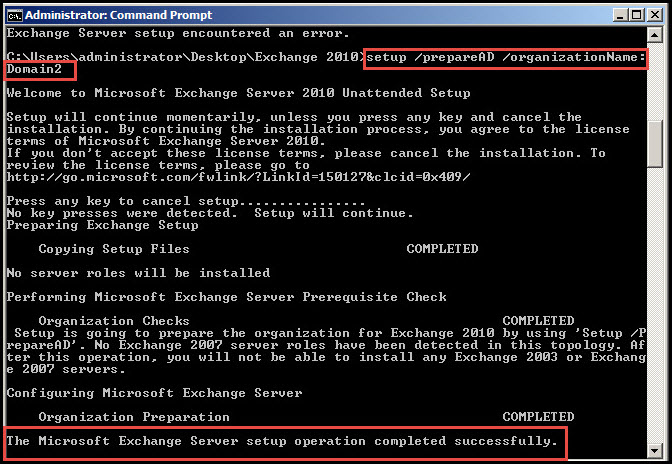
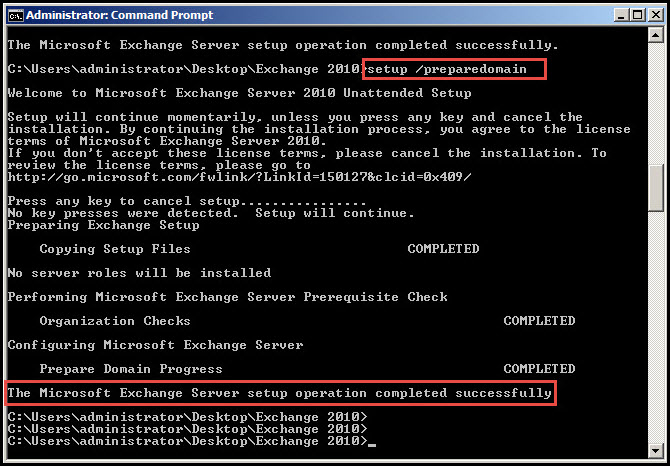
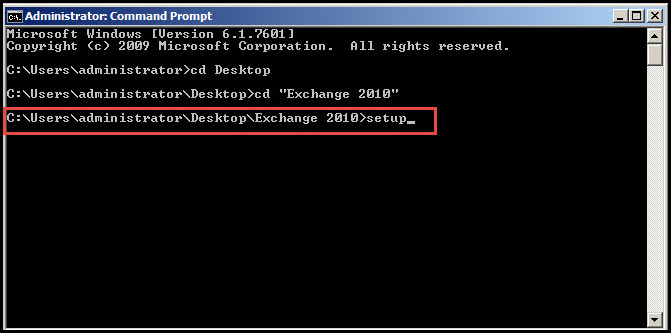
Step 2: The next step is to prepare Schema, AD and Domain. Open the “Command” prompt and access that drive where you can extract the ISO file of Exchange Server 2010.
Type the following commands:
1. (>Setup /prepareSchema) Check the screenshot.
2.(>Setup /prepareAD /OrganizationName:Domain2) Check the screenshot.
3. (>Setup /prepareDomain) Check the screenshot.
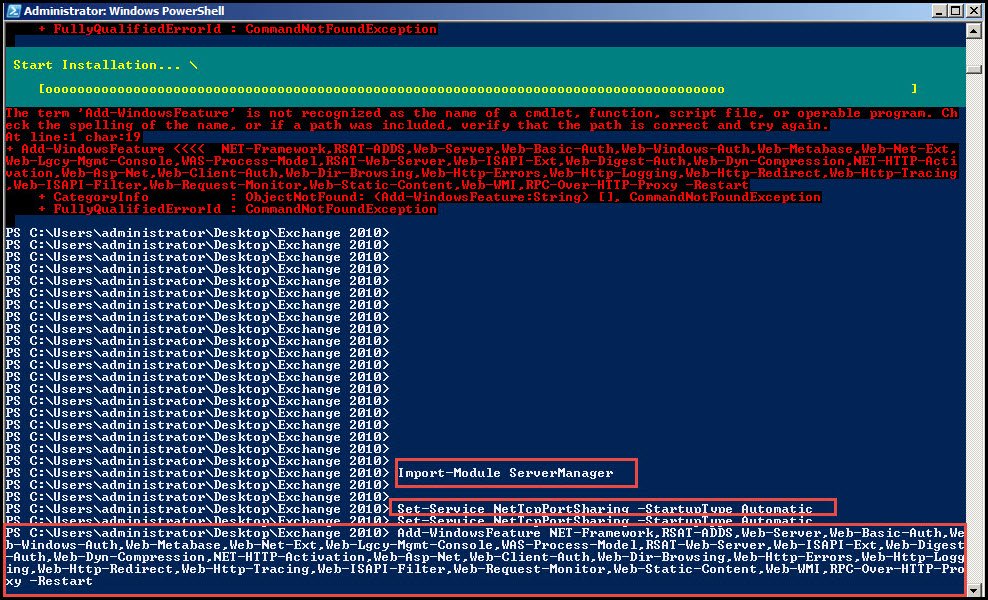
Step 3: Open PowerShell and import the Server Manager Module
C:\>Import-Module ServerManager
C:\>Set-Service NetTcpPortSharing -StartupType Automatic
C:\>Add-WindowsFeature NET-Framework,RSAT-ADDS,Web-Server,Web-Basic-Auth,Web-Windows-Auth,Web-Metabase,Web-Net-Ext,Web-Lgcy-Mgmt-Console,WAS-Process-Model,RSAT-Web-Server,Web-ISAPI-Ext,Web-Digest-Auth,Web-Dyn-Compression,NET-HTTP-Activation,Web-Asp-Net,Web-Client-Auth,Web-Dir-Browsing,Web-Http-Errors,Web-Http-Logging,Web-Http-Redirect,Web-Http-Tracing,Web-ISAPI-Filter,Web-Request-Monitor,Web-Static-Content,Web-WMI,RPC-Over-HTTP-Proxy –Restart)
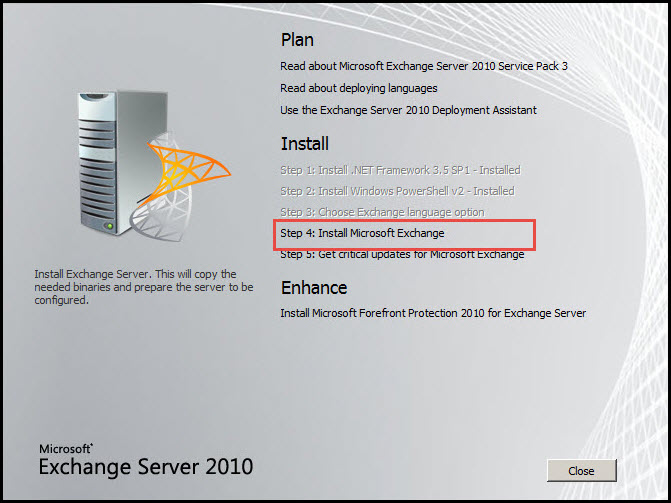
Step 4: This is how the Exchange Server gets all needed packages. You can finally run the Exchange Server Setup.
Step 4.1: Click on the “Install Microsoft Exchange” option on the Server Setup.
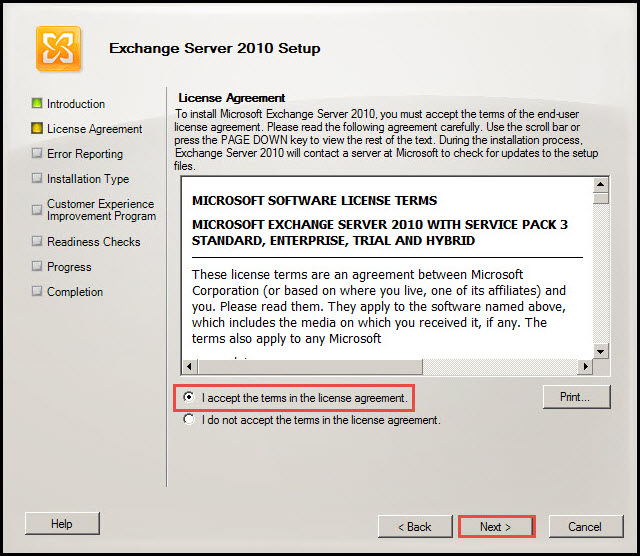
Step 5: Accept the License agreement and click on the “Next” button.
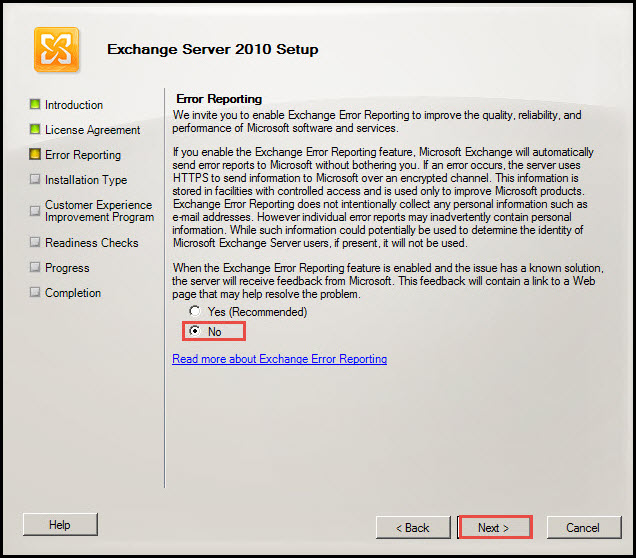
Step 6: If you want to send error to Microsoft, select “Yes.” If not, select “No.” Click on the “Next” button.
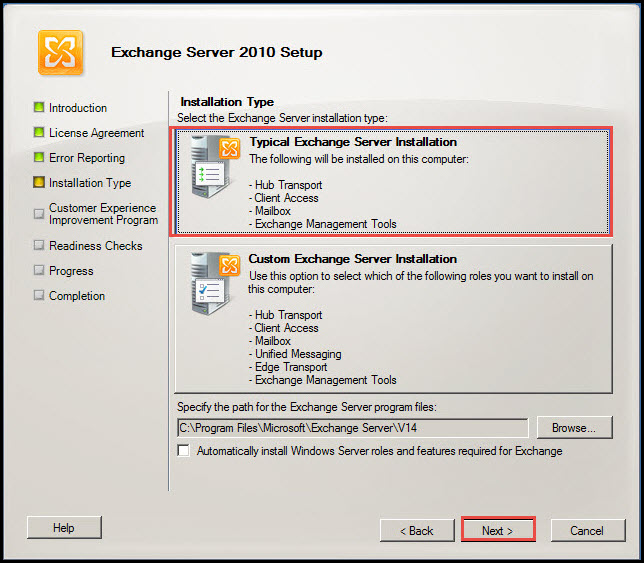
Step 7: Select the Exchange Server Installation type. Choose “Typical” or “Custom” Exchange server installation. Click on the “Next” button.
Step 8: Select the “The Client Access Server Role Will be Internet-Facing” option and type in the domain name. Now click on the “Next” button.
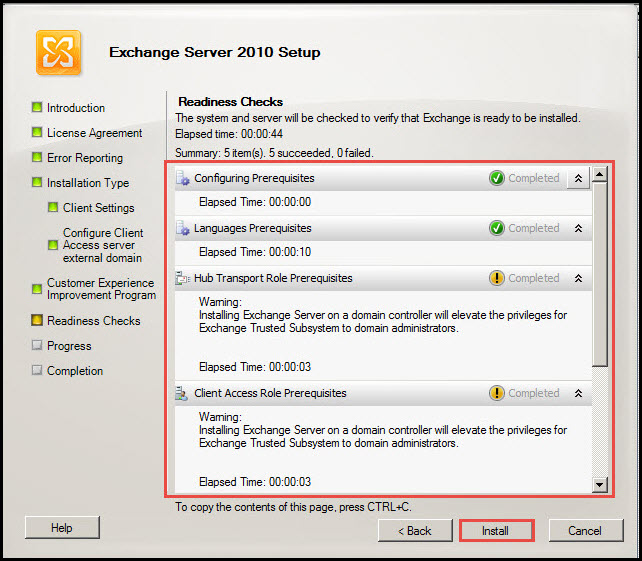
Step 9: At this point, the system and server will check to verify if the Exchange is ready for installation. Click on the “Next” button.
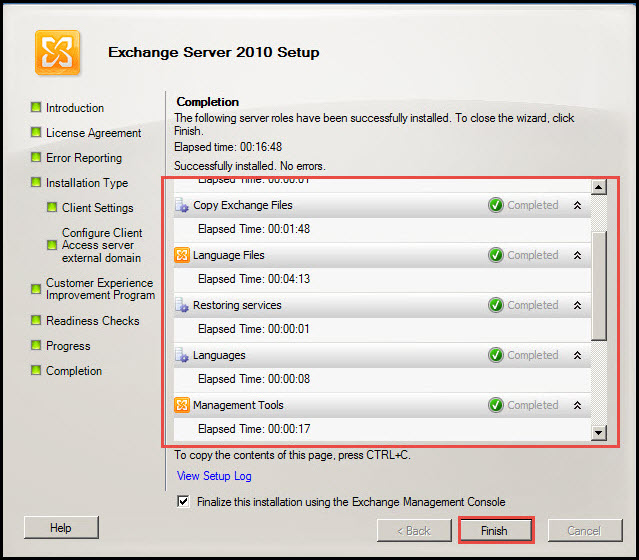
Step 9.1: As you can see in the screenshot below, the server roles are successfully installed. Click on the “Finish” button to end the process.
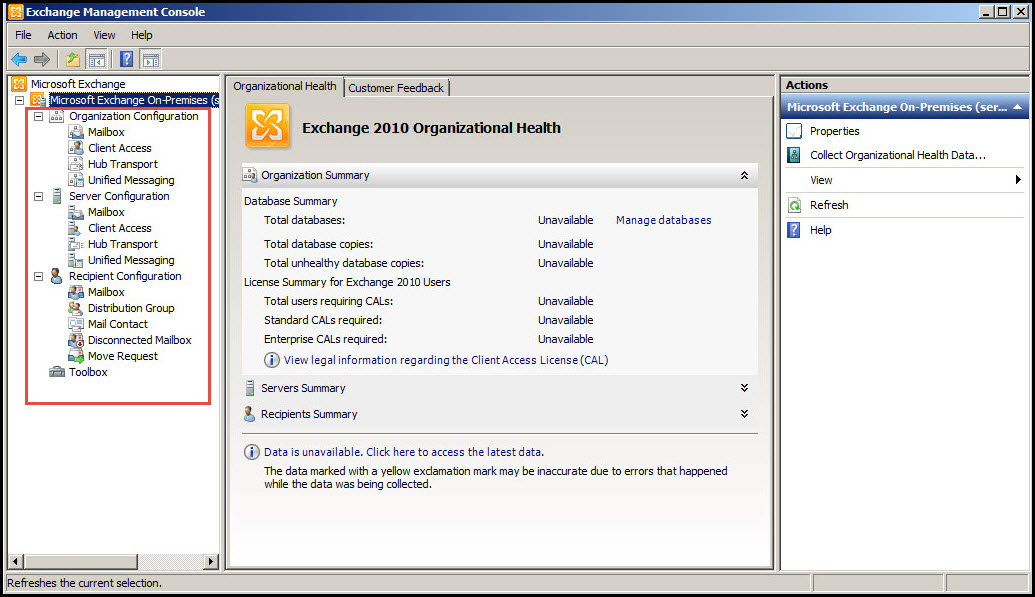
Step 10: On opening the Exchange Management Console, you’ll see that all the Exchange Server Roles have been installed.
If you get stuck while trying to install Exchange Server 2010 in Windows Server 2008 R2, our professionals will help you get back on the track. Write your queries in the comment section below and we shall try to answer them in about a day or two.


