“Shared Mailbox” is a mailbox, which allows accessibility to multiple users. This is an inbuilt feature in all Microsoft Exchange Servers. Information about the Shared Mailbox is visible in the mail box list of the recipient mailbox.
In this article we are going to learn how to create a Shared Mailbox by using the Exchange Management Shell. The shared mailbox can only be created in the Exchange Management Shell. It is not created in the Exchange Management Console.
Once we create a Shared Mailbox, we will be able to apply permissions on it. These permissions are applied by the Exchange Management Shell or Exchange Management Console, or both.
Step 1: Open the Exchange Management Shell. Now, type the following command to create a Shared Mailbox:
>New-Mailbox –UserPrincipalName Sharedxyz@bks.local –Alias “Sharedxyz” –Name “Sharedxyz” –shared
Here we will see that a “Sharedxyz” mailbox will be created.
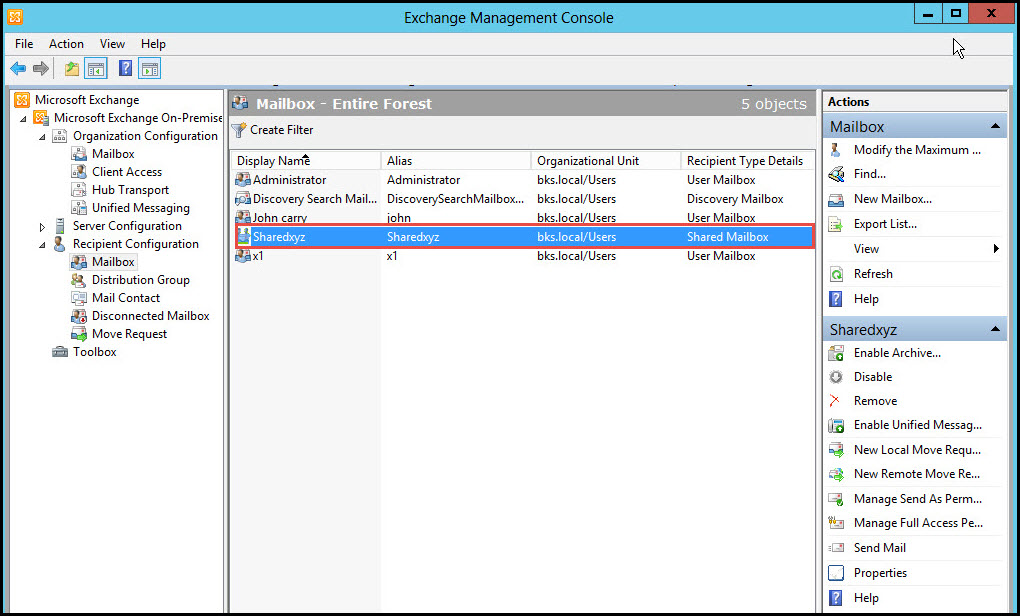
Step 2: Open the Exchange Management Console. In the “Recipient Configuration” tab click on the “Mailbox” option. Here, we see the new “Sharedxyz” Shared Mailbox.
How to Convert a User’s Mailbox Into a Shared Mailbox in EMC
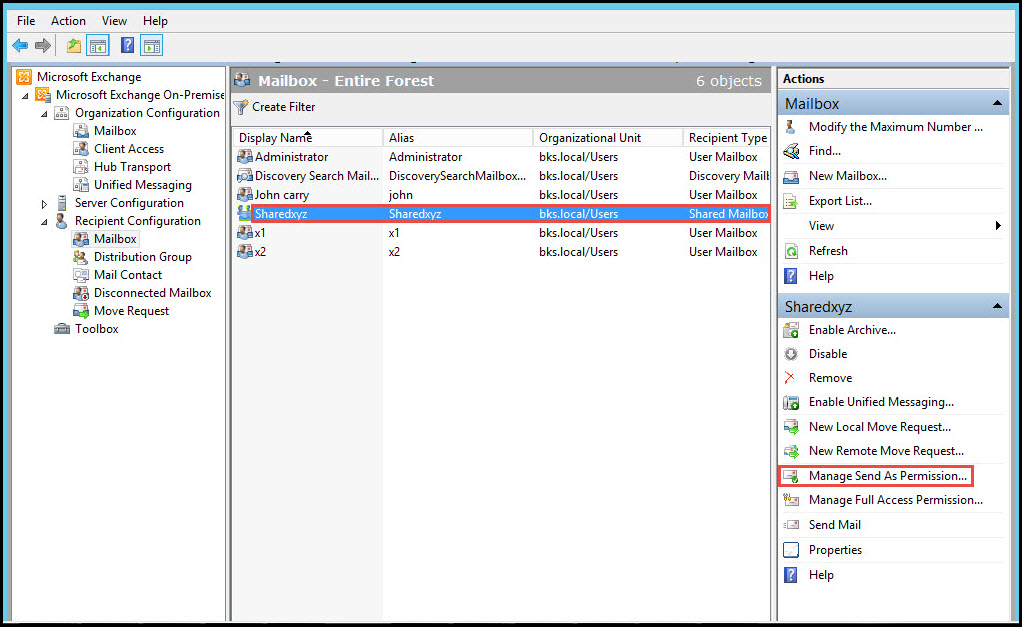
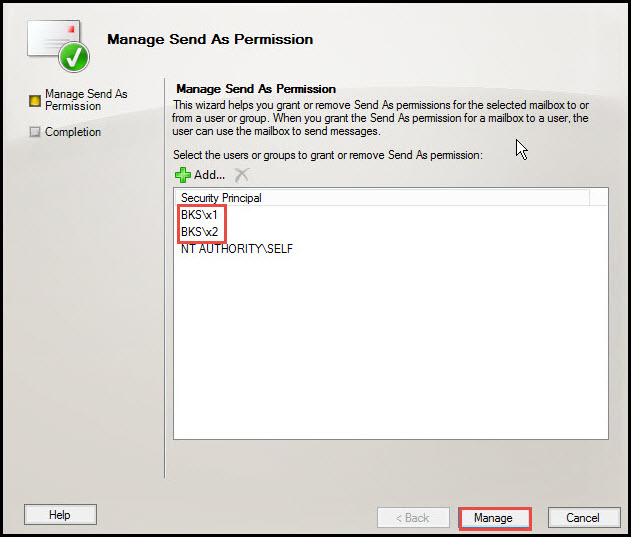
Step 3: Select the Shared Mailbox “Sharedxyz” and click on the right side of the Exchange Management Console. Click on the “Manage Send as Permission” option.
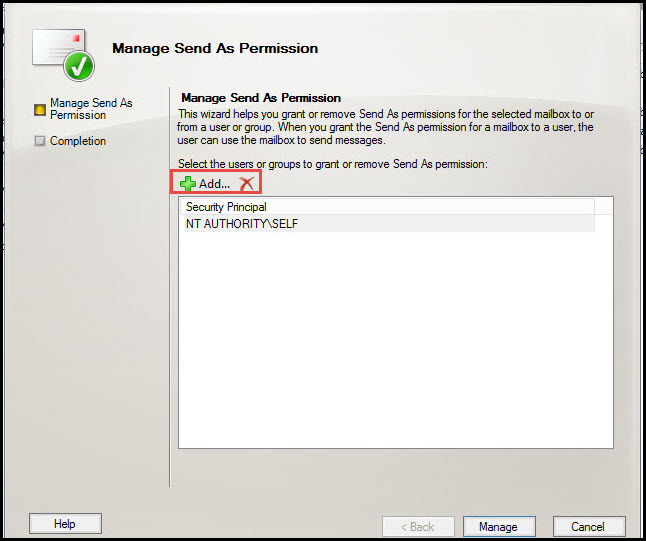
Step 4: On the “Manage Send as Permission” wizard that pops up, click on the “Add” button.
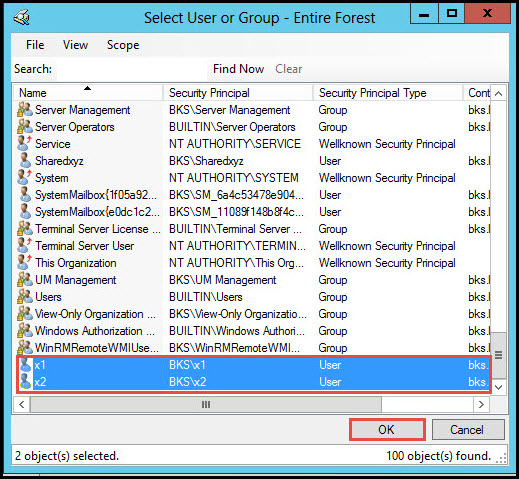
Step 5: Select the users whom you want to grant access to the Shared Mailbox. Now click on the “OK” button.
Step 5.1: Next click on the “Manage” button.
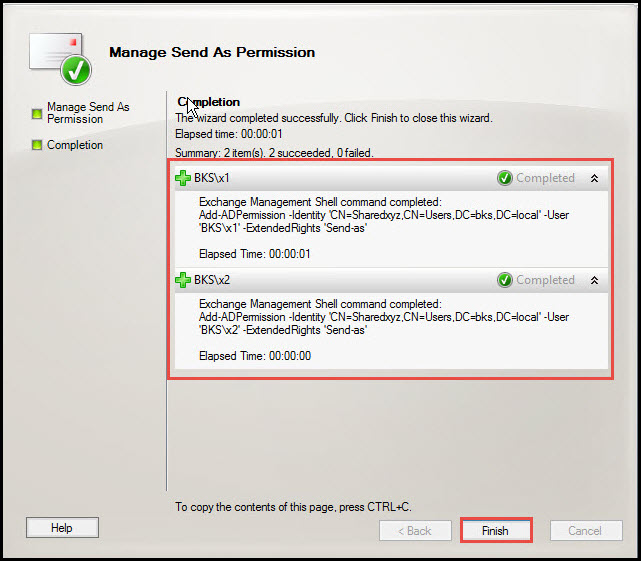
Step 6: You will see the “Manage send as Permission” is successfully applied on both the users. Now click on the “Finish” button.
How to Convert Users Mailbox into Shared Mailbox in EMS
Step 7: We can also create “Manage send as Permission” with the aid of the Exchange Management Shell. For this, type in:
>ADD-ADPermission –Identity ‘CN=Sharedxyz,CN=Users, DC=bks,DC=local’ –User x3@bks.local –ExtendedRight ‘Send-as’
Similarly, We “Manage Send as Permission” for other users in the CLI mode.
How to Access Shared Mailbox from other user by using OWA
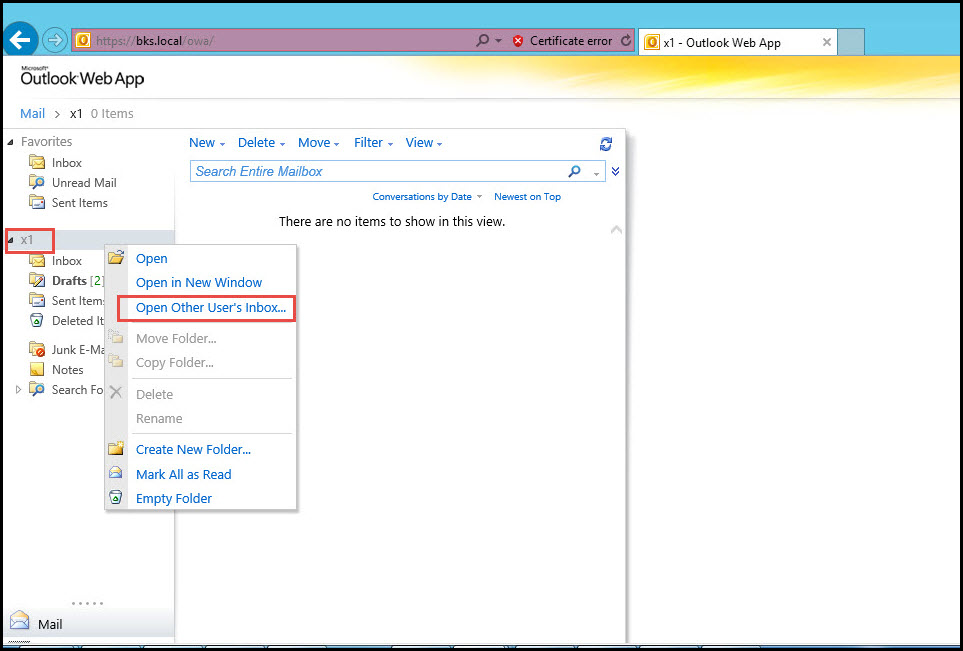
Step 8: Log on as user (x1), who is a member of the Shared Mailbox. Right click on X1 (Mailbox of user), now click on the “Open” button on the other user’s Inbox.
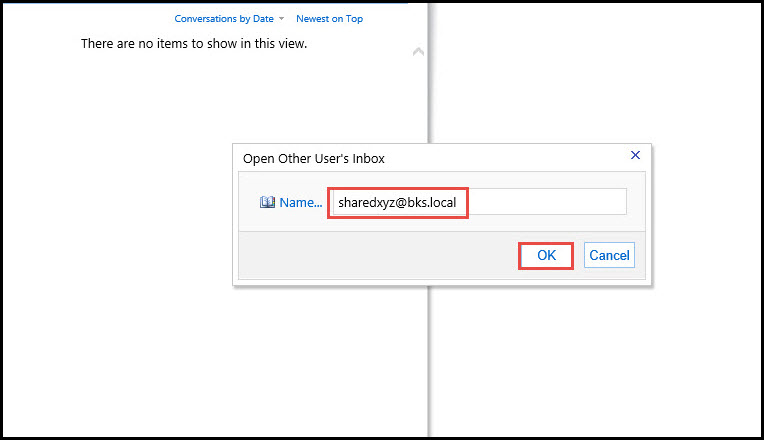
Step 9: Type Name of the Shared Mailbox (Sharedxyz@bks.local). Click on the “OK” button.
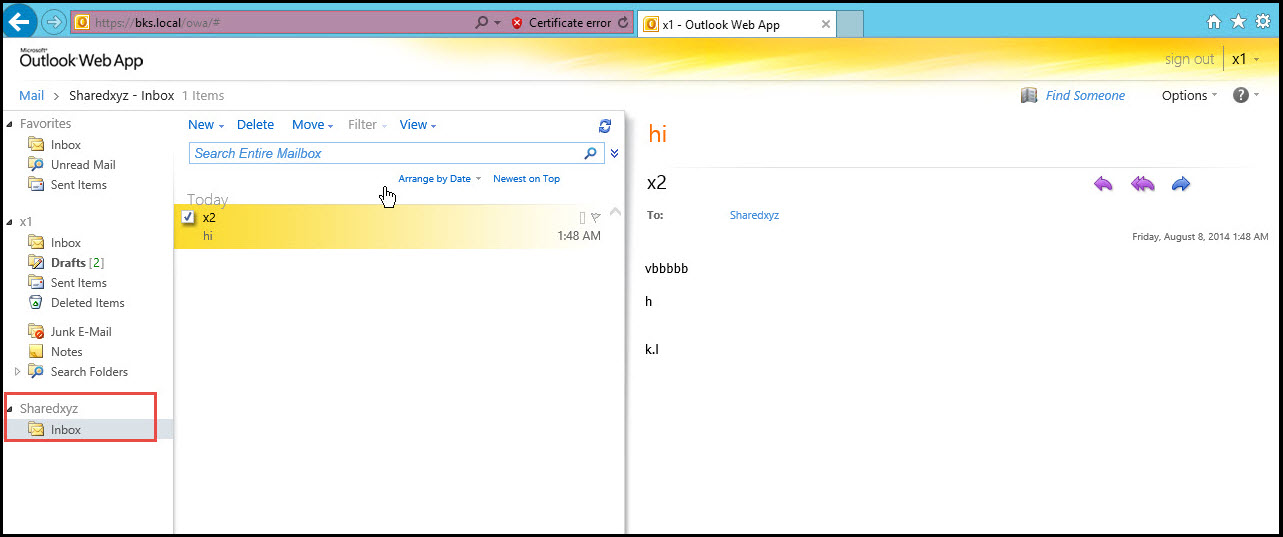
Step 10: Here, we see the shared mailbox (Sharedxyz@bks.local) in the email account of “x1” user.
Similarly, we can configure the Shared Mailbox for other users.
If you need help, or have any questions, feel free to drop your queries in the comment box below and we shall try to provide answers at the earliest.


