An “Address List” is basically a group of recipients and other objects within the Active Directory Domain Services. One of the biggest advantages of the Address List is that it makes finding huge lists of resources and recipients from the exchange environment easier.
This means when you add new recipients to the organization, they automatically get added to the Address List.
The Address List may contain one or more kinds of objects, including:
- Users
- Groups
- Contacts
- Public Folder
- Conferencing
- Resource Groups
How to Create and Configure Address List by EMC
In this tutorial, we will learn how to create as well as configure an Address List in Exchange server 2010.
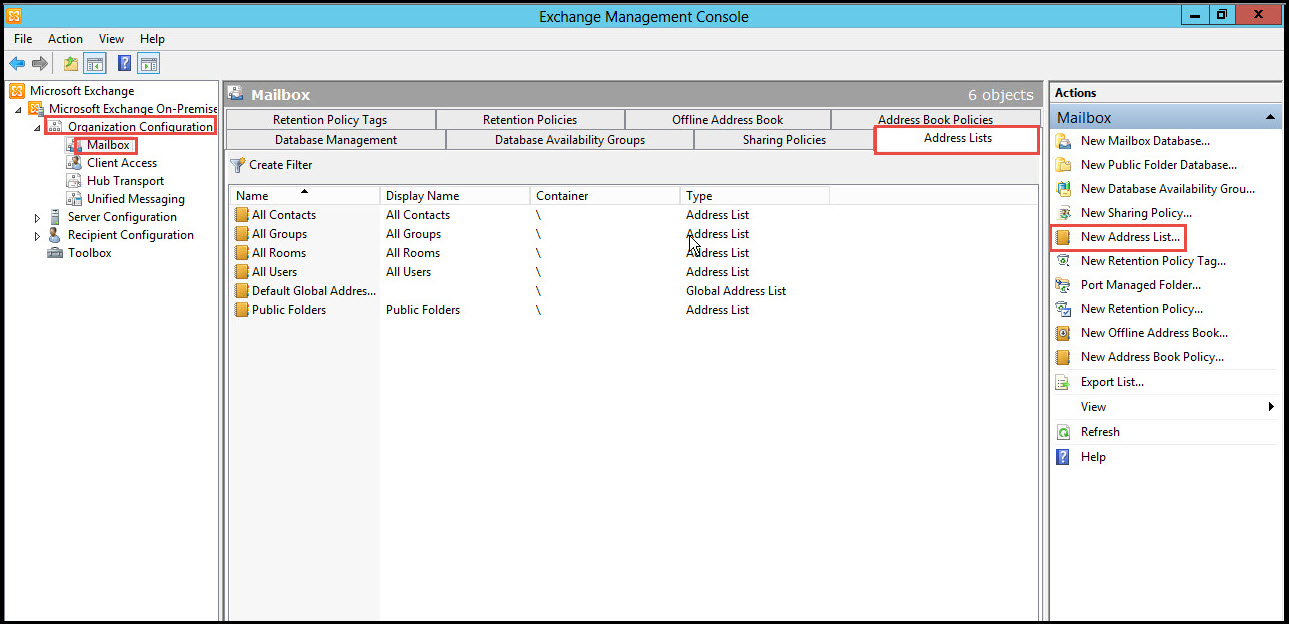
Step 1: Open the Exchange Management Console. From the “Organization Configuration” tab, click on the “Mailbox” option and hit on the “Address List” tab.
Next, on right side of the EMC, click on the “New Address List” option from the drop down menu.
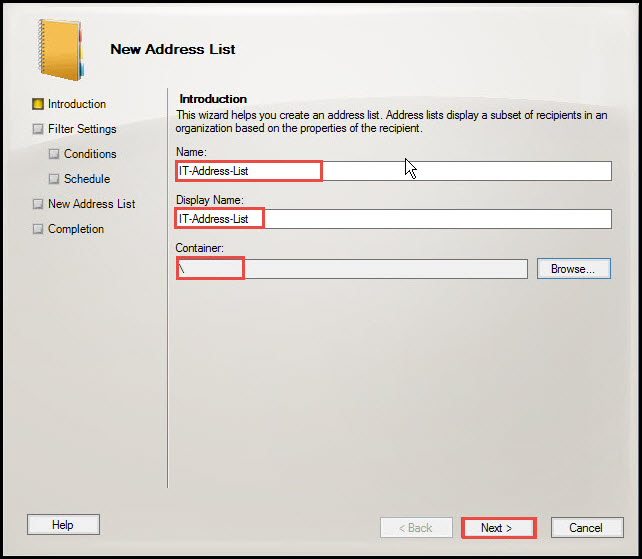
Step 2: Type the “Name” for the New Address List. Click on the “Next” button.
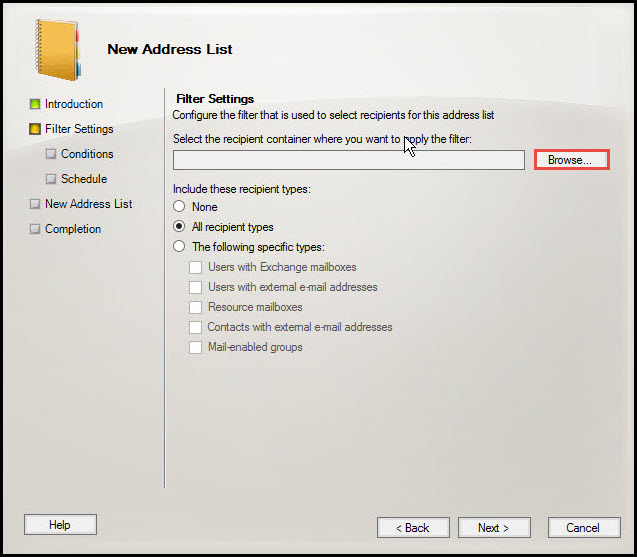
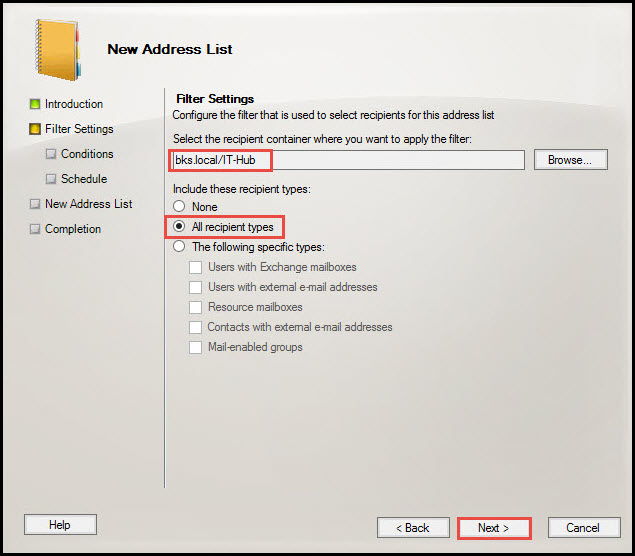
Step 3: In Filter Settings, click on the “Browse” button. (Check the screenshot below)
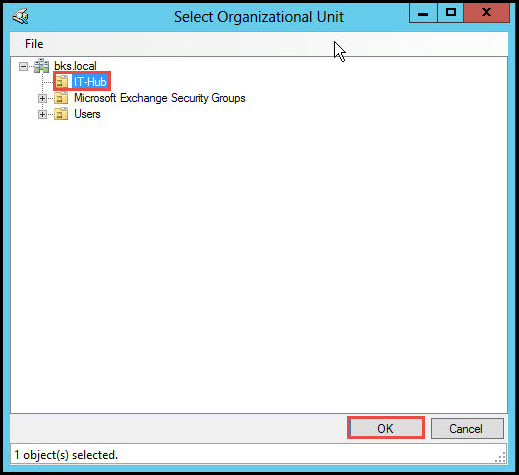
Step 4: Select the “Organization Unit” option and click on the “Ok” button.
Step 5: Select the default by clicking on the “All recipient Types” for the recipient type. Click on the “Next” button.
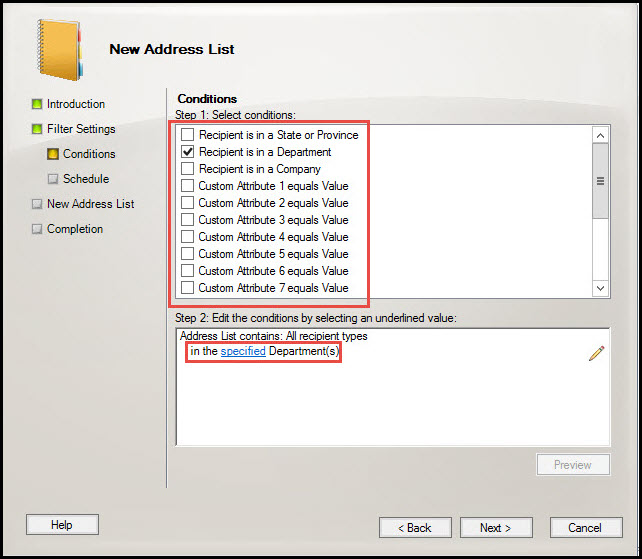
Step 6: From this new Window, select the conditions you want and click on the “Specified Department” option.
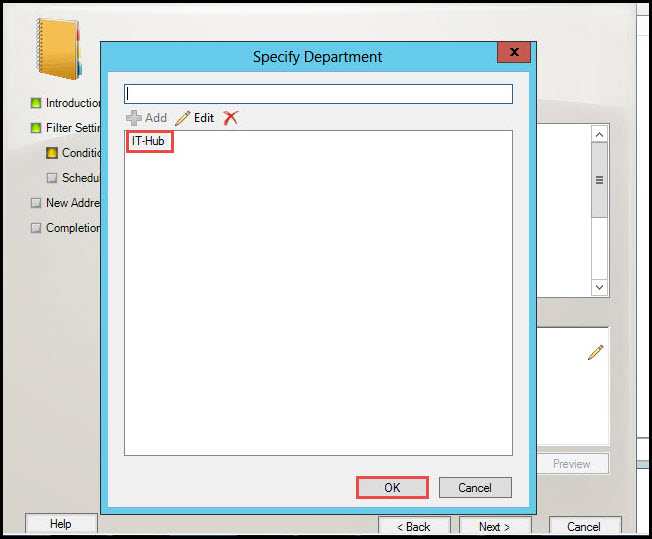
Step 7: Select the “Organization Unit” as “IT-Hub.” Click on the “Ok” button.
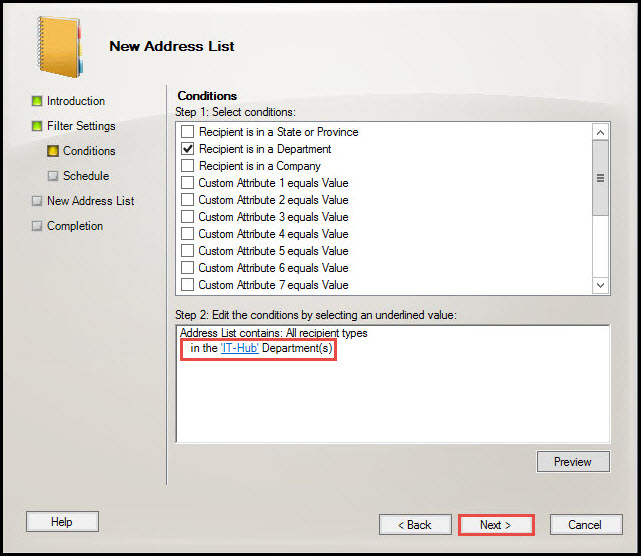
Step 8: At this point, you will see the condition applied automatically to the recipients of the “IT-Hub” department. Now, click on the “Next” button.
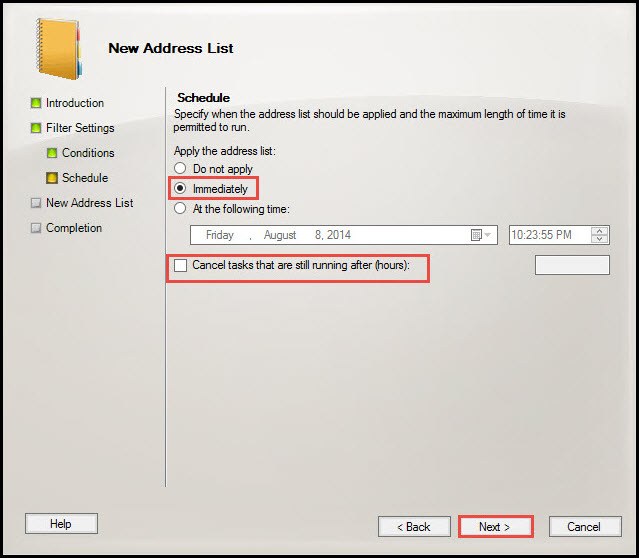
Step 9: Select the “Schedule” as “Immediately.”
But if want it to apply at a later time, specify it in the box given under “At the Following Time”
And if you want to cancel all tasks that are running, Click on the last option and specify the hours needed. You can otherwise uncheck this Option.
Now, click on the “Next” button.
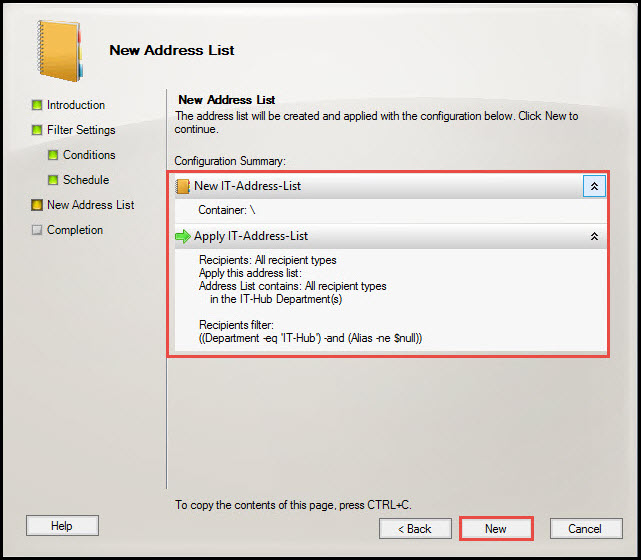
Step 10: Click on the “New” option.
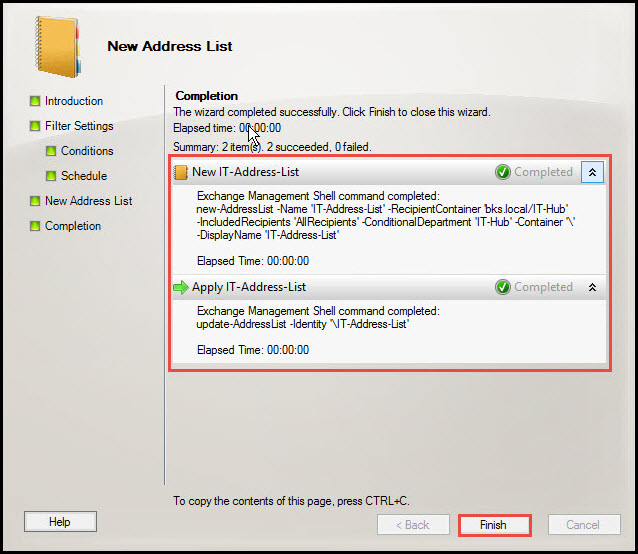
Step 11: Here, you can see a new Address List created in Exchange 2010. Now, click on the “Finish” button.
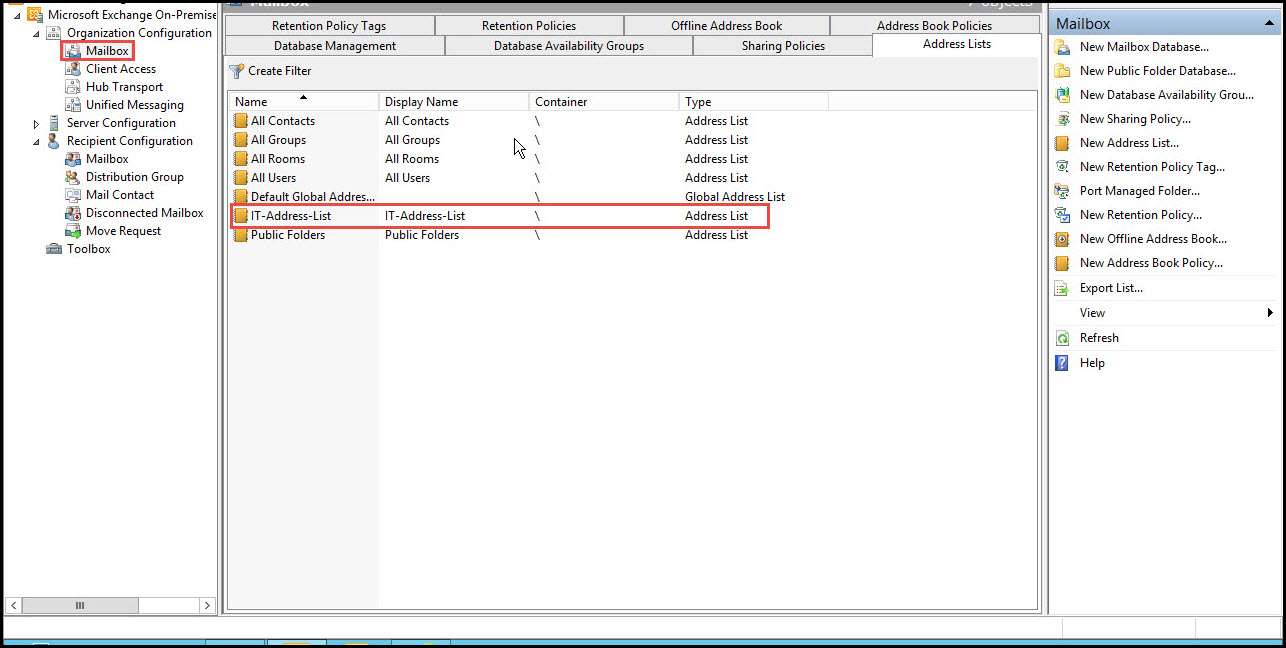
Step 12: Open the EMC and click on the “Mailbox” option in the“Organization Configuration” tab. You should be able to see the New Address List now.
How to Create and Configure Address List by EMS
We can also create and configure a New Address List by EMS. Type in the command:
>New-AddressList –Name ‘Address-List-2’ –RecipientContainer ‘Bks.local/IT-Hub –IncludedRecipients ‘AllRecipients’ –ConditionalDepartment ‘IT-Hub’ –Container ‘\’ –DisplayName ‘Address-List-2’
(Check on the screenshot below)
In case you had problems in understanding any of the above mentioned steps, feel free to clear your doubts. Call our professionals and we will help complete the process of a creating a New Address List in Exchange 2010.


