When working with Windows Server, you’ll have to make use of the File Transfer Protocol (FTP) and hence an FTP Server at one point or the other.
Setting up this server on Win Server 2012 is quick and easy.
Follow this step by step guide for FTP server configuration on Windows Server 2012 Edition:
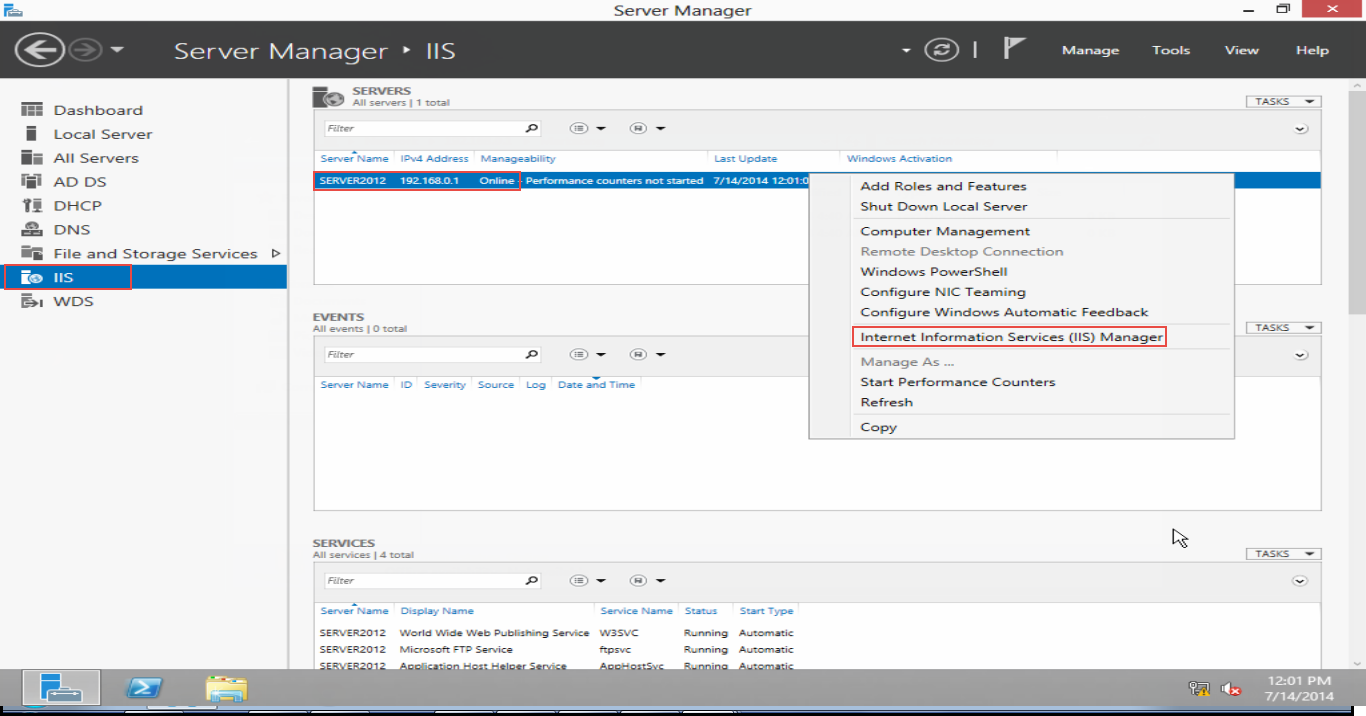
Step 1: Select the “IIS” option and right click on the “Server” tab.
Step 2: Click on the “Internet Information Services (IIS) Manager” option. (Check the screenshot below)
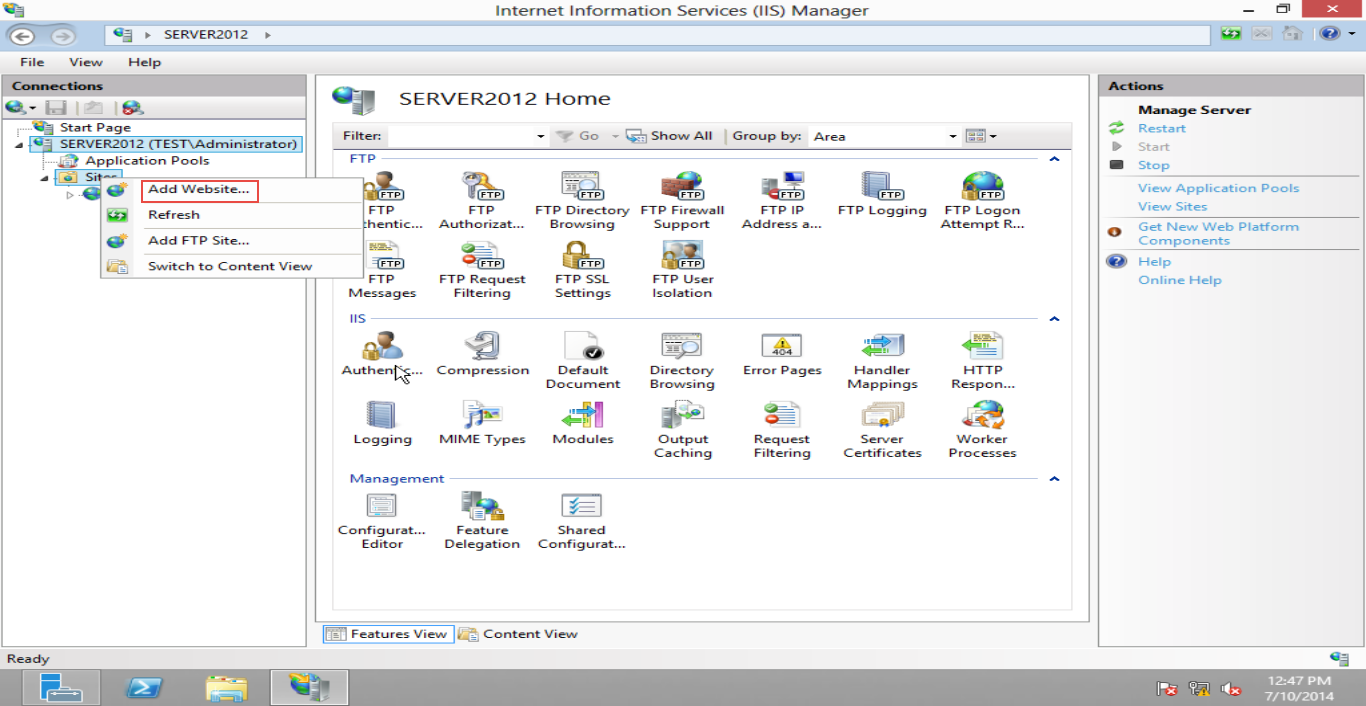
Step 3: Click on the “Server” option on the left side panel of the screen.
Step4: Right click on the “Site” option and select the “Add Website” option. (Check the screenshot below)
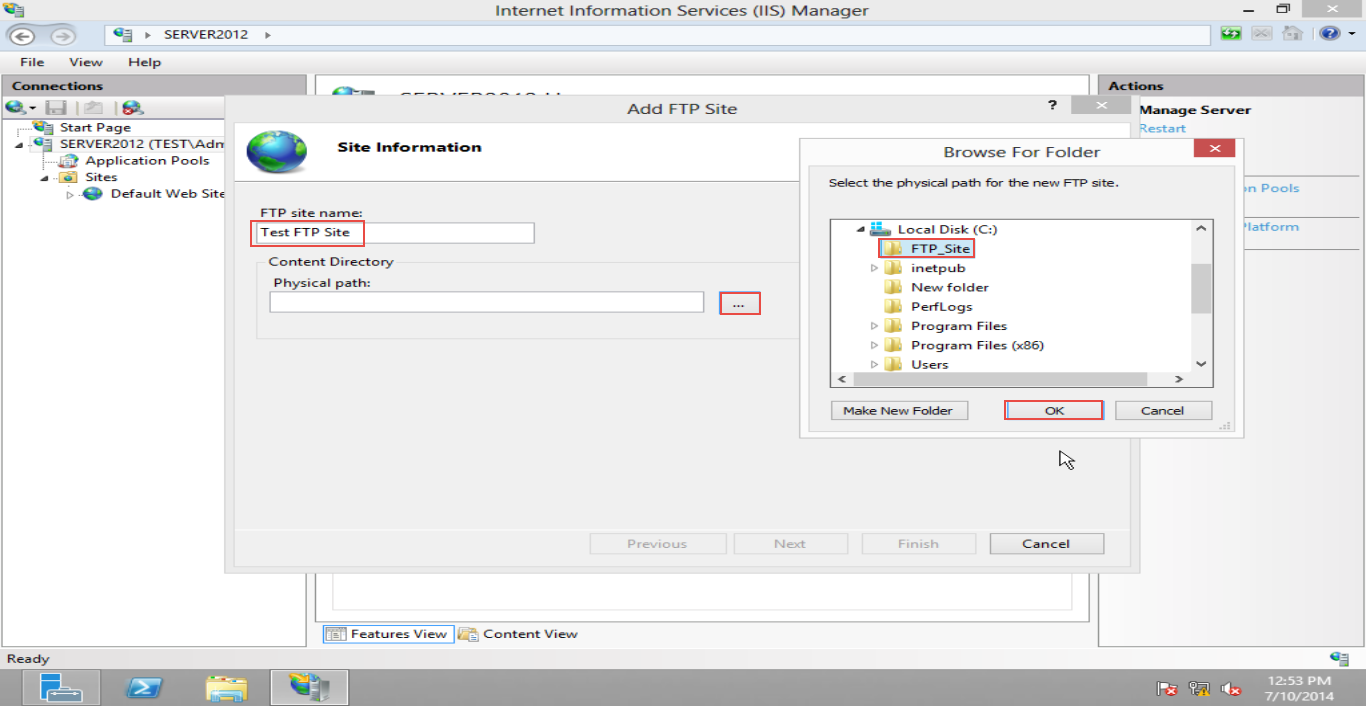
Step 5: Enter the “FTP Site Name” andselect the “Physical Path.” Now, click on the “Ok” button. (Check the screenshot below)
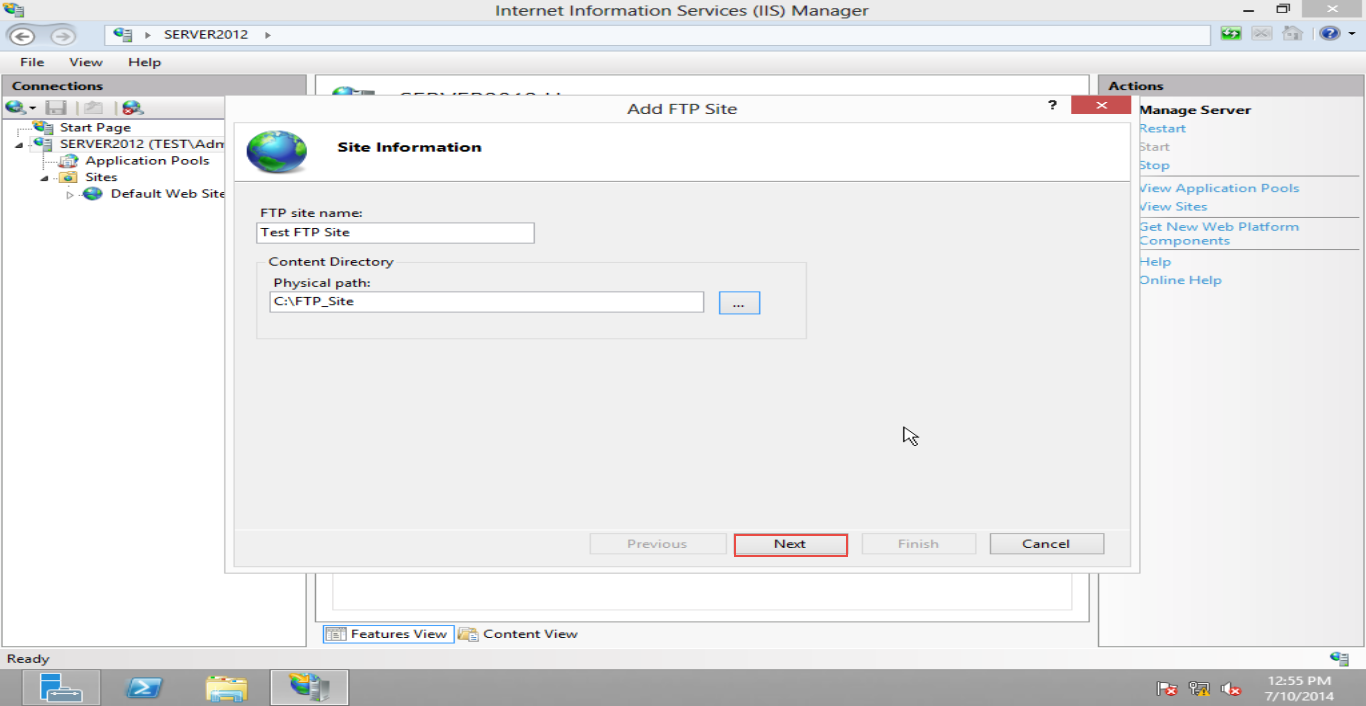
Step 6: Click on the “Next” button to proceed. (Check the screenshot below)
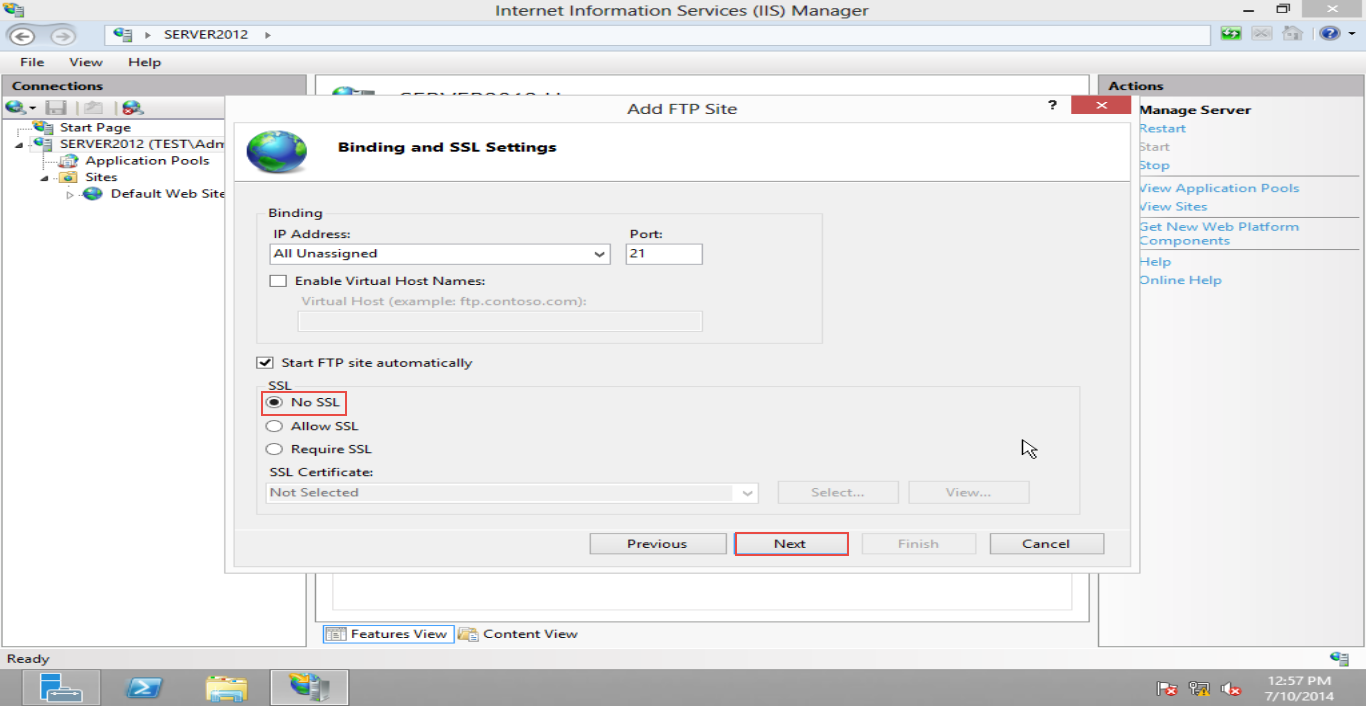
Step 7: Select the “No SSL” option. (Check the screenshot below)
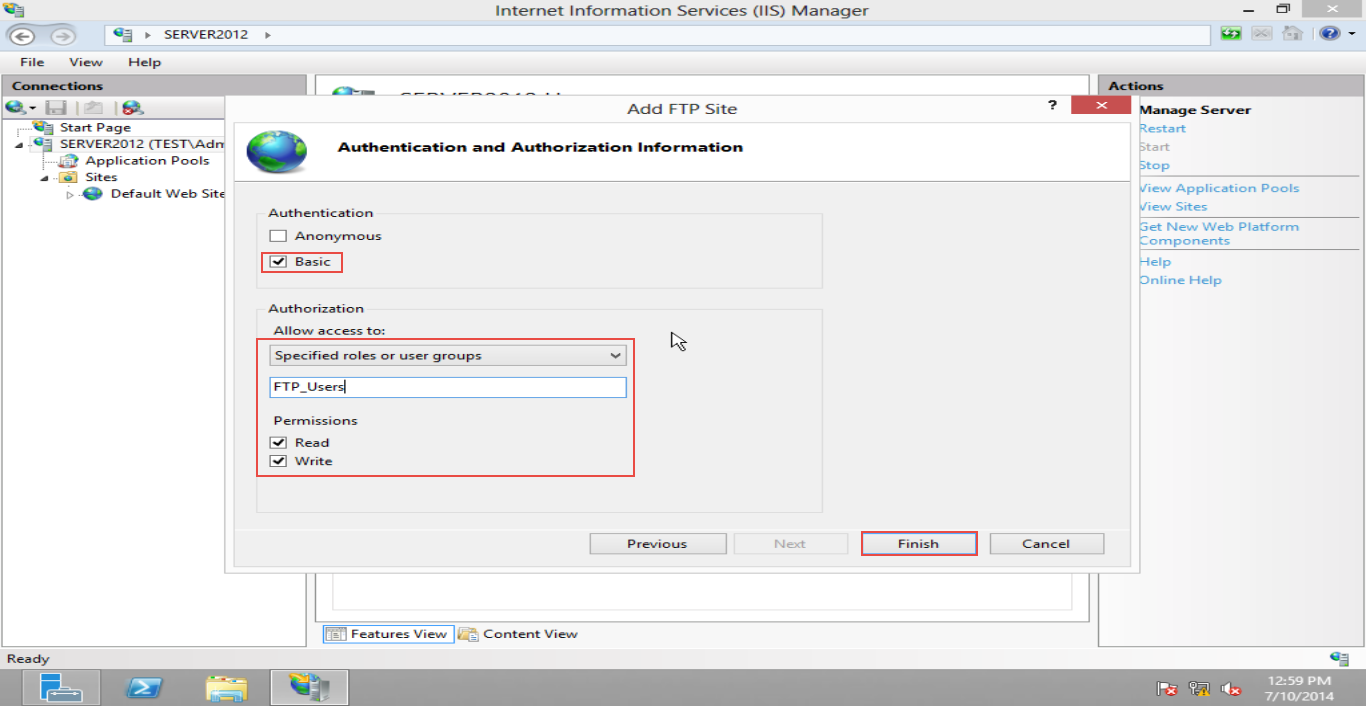
Step 8: Now, choose an “Authentication” type:
- Basic
- Specified roles or user groups
- Then click on “Finish”. (Check the screenshot below)
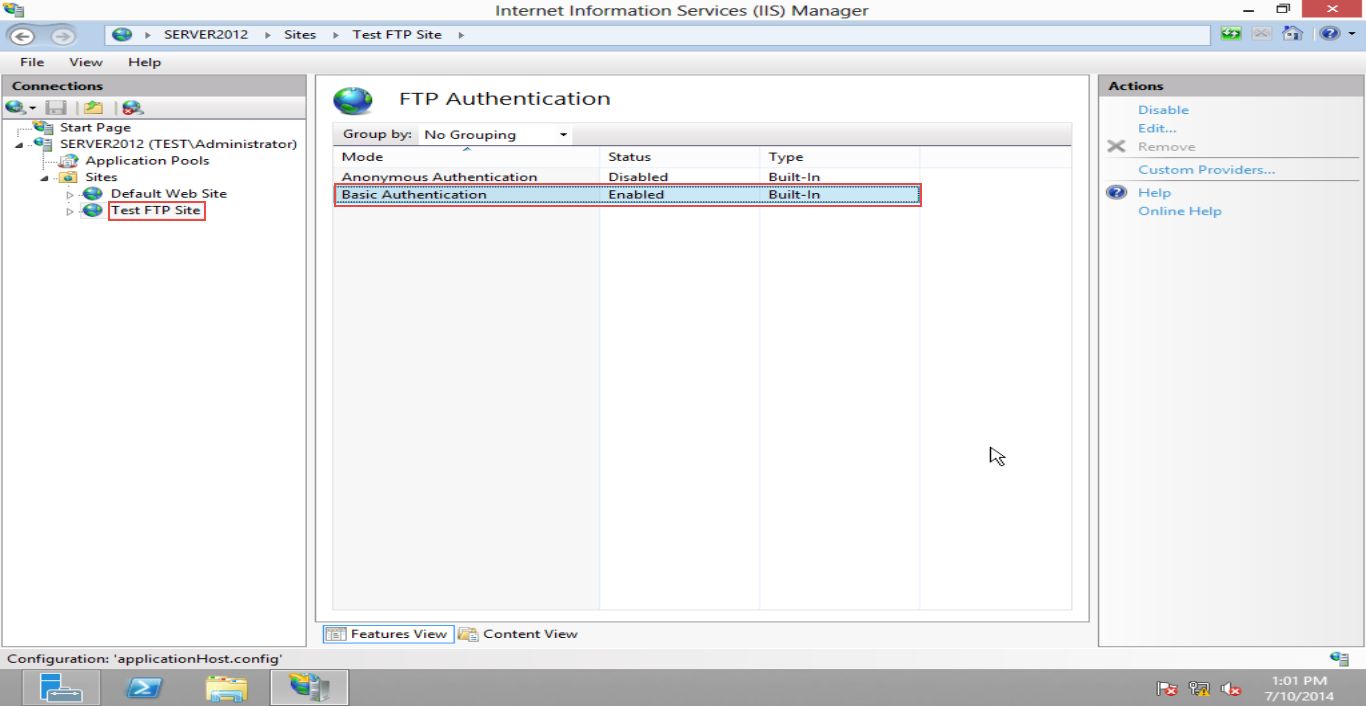
Step 9: Here, the FTP Authentication status should be “Enabled”. (Check the screenshot below)
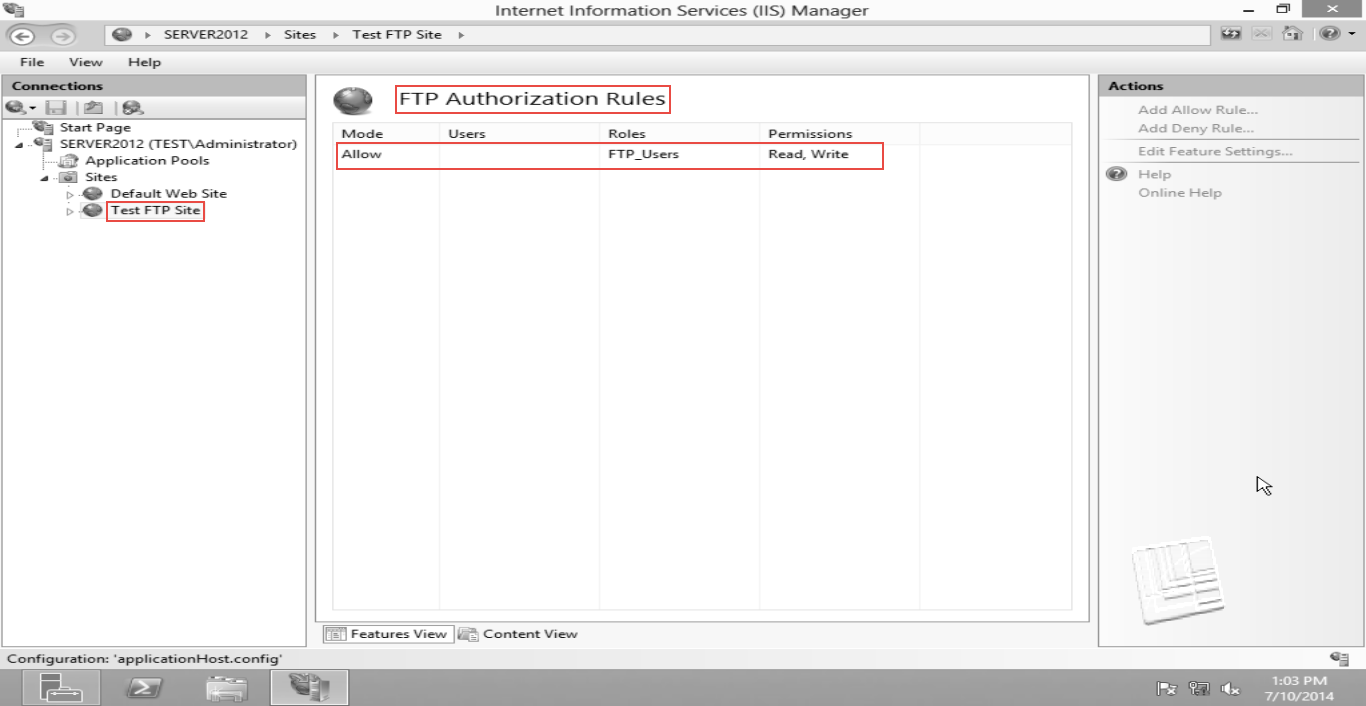
Step 10: Check FTP Authorization Rules. (Check the screenshot below)
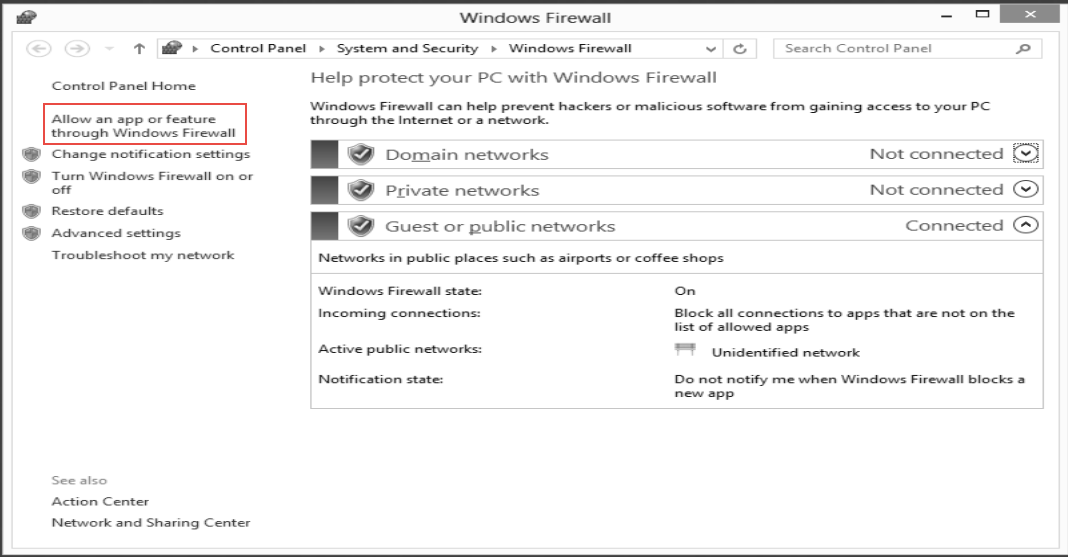
Step 11: Open Windows firewall on the server and click on the “Allow an App or Feature through Windows Firewall” option. (Check the screenshot below)
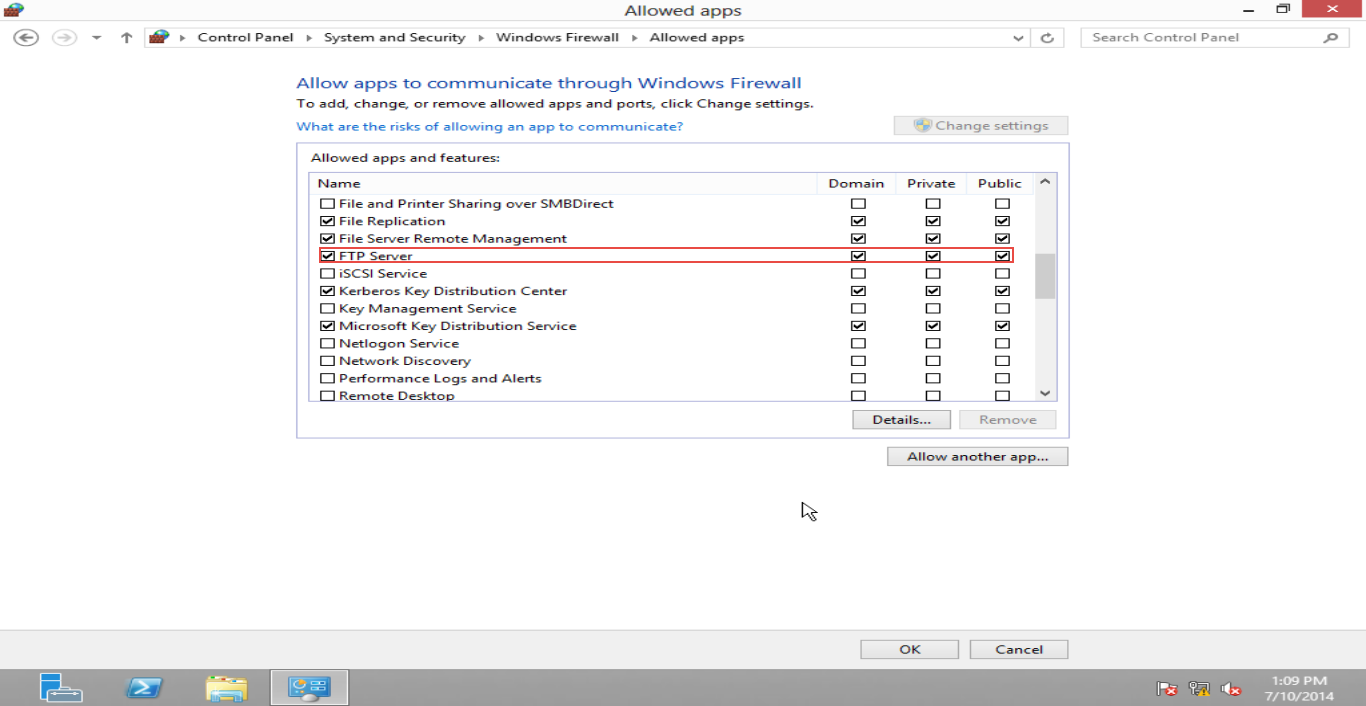
Step 12: Check the “FTP Server” status. (Check the screenshot below)
Step 13: Select Windows Firewall and next, choose the “Advanced Setting” option. (Check the screenshot below)
Step 14: Click on the “Inbound Rules” option and check the statusof the “FTP Server”. (Check the screenshot below)
That’s all.
You’ve successfully configured FTP Server on Windows Server 2012.
If you’ve any questions or need assistance, write a comment below. Feel free to ask any question on FTP Server setup or configuration on Server 2012, no matter how basic or advanced.


