Pictures can liven up any document. They help in reinforcing your message and give peoples’ eye a welcome rest. But the true reason you’ll want to add pictures, drawings, clip art and more is that it’s super exciting and fun to add life to your pages. In this step by step tutorial, we will demonstrate how you can insert images in Microsoft Word documents.
Pictures or clip-art can be inserted in an MS Word document from various different sources (online or on local hard drive, for example).
For instance, they can be downloaded from website, inserted from a saved folder or even copied from a web page. This article provides a brief introduction on working with images in Microsoft Word.
The basic steps on how to insert an Image in an MS Word document are as follows:
Step 1: To get started, simply go to the “Start Menu”.
Step 2: Type in “Microsoft Office Word” in the “Search Programs and Files” space. Here, you can select the Microsoft Office Word option by clicking on it. (Check the Screenshot Below)
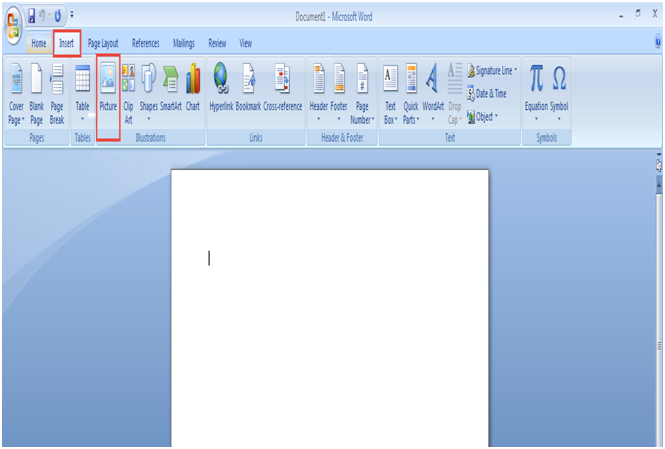
Step 3: Click on the “Insert” option on the MS Word menu bar
Step 4: Next, click on the “Picture” tab on the standard toolbar in order to insert the image. (Check the Screenshot Below)
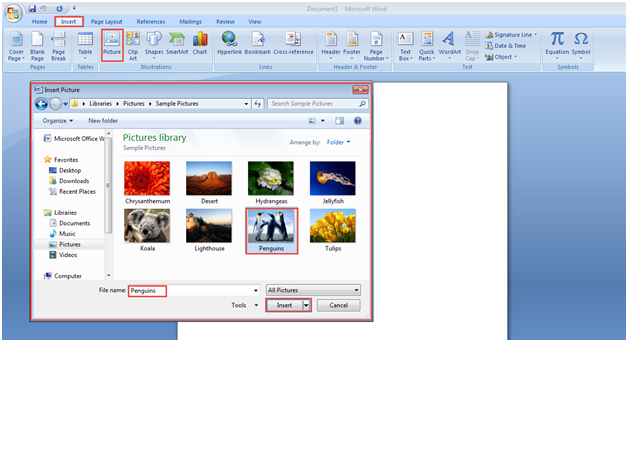
Step 5: A dialogue box displaying the saved images on your computer system will now appear on the screen. Select the desired image. For example, we’ve clicked on ‘Penguins’ here.
Step 6: Click on the “Insert” tab to insert the image into the MS Office Word document. (Check the Screenshot Below)
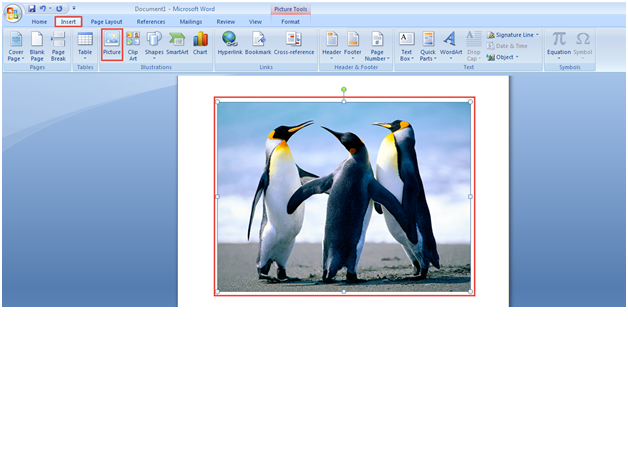
Step 7: The selected image will now be inserted into the MS Word document. (Check the Screenshot Below)
Congratulations! You’ve successfully inserted an image in a Word document.
In case you were unable to follow through the above step by step guide on inserting images in MS Word documents, don’t worry. We are here to help.
Just narrate your problem in the comment section below and we will get back to you with a detailed explanation.


