RODC (read-only domain controller) is an all new domain controller in Windows Server 2008 Operating System. It helps organizations to conveniently configure a domain controller in locations where any form of physical security is not guaranteed.
In Microsoft Windows Server 2008, we can configure Read Only Domain Controller (RODC) for improved security, better access to resources on the network and shorter logon times.
Follow the steps mentioned below on how to install Read Only Domain Controller (RODC):
Mentioned below are few things we need to check before installing RODC:
- Windows Server based Operating System
- Same IP Address range with existing Domain Controller
- Administrator credentials of existing Domain controller
- Proper connectivity with existing Domain controller
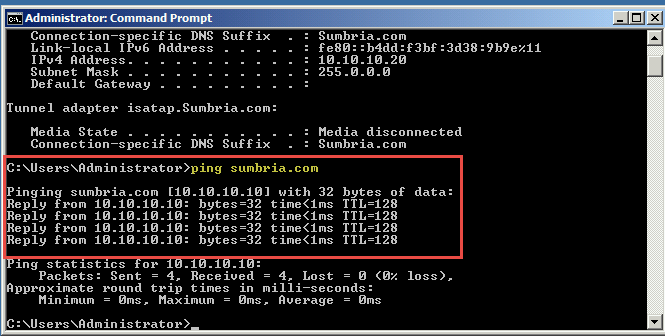
- Pinging Response of existing domain controller. (Check the screenshot below)
Here’s a step by step guide on how to install read only domain controller:
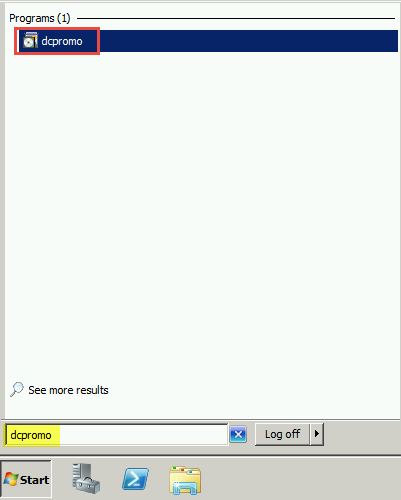
Step 1: Go to the Start Menu and type “Dcpromo” in the “Search Programs and Files” space.
Step 2: Run Dcpromo. (Check the screenshot below)
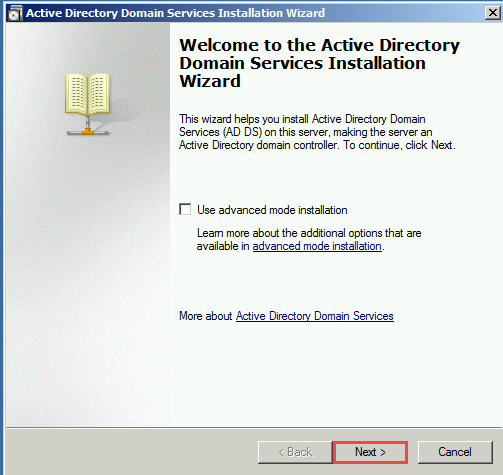
Step 3: A dialogue box displaying “Welcome to the Active Directory Domain Services Installation Wizard” will appear on your screen. Click on the “Next” button to continue. (Check the screenshot below)
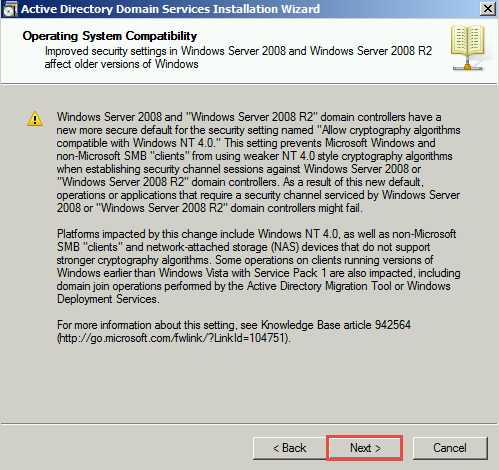
Step 4: “Operating System Compatibility” dialogue box will now load on your screen. Click on the “Next” button to continue. (Check the screenshot below)
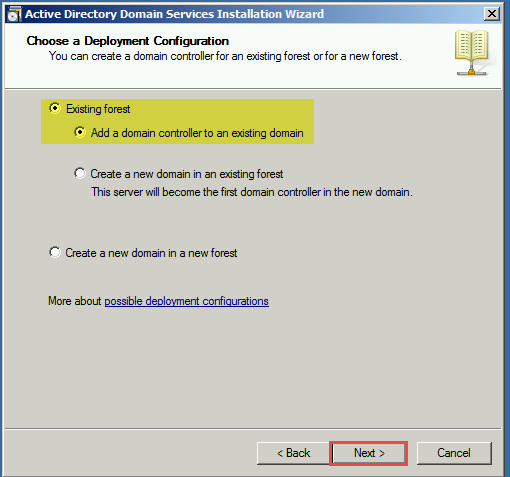
Step 5: “Choose a Deployment Configuration” dialogue box will now be displayed. Select “Existing Forest” and “Add a Domain Controller to an Existing Domain”.
Step 6: Click on the “Next” button to continue. (Check the screenshot below)
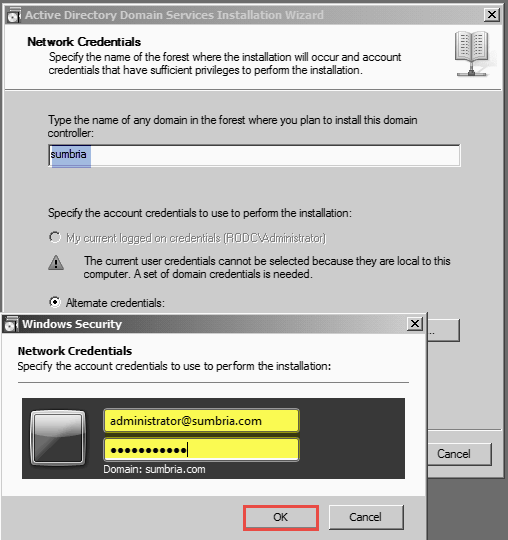
Step 7: “Network Credentials” dialogue box will ask for your “Domain Controller” name. Set administrator credentials of existing domain controller.
Step 8: Click on the “OK” button. (Check the screenshot below)
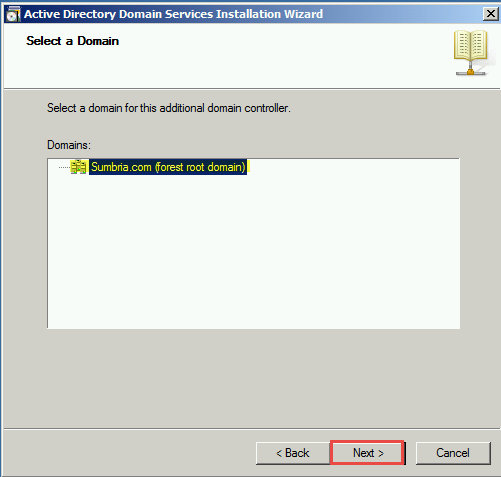
Step 9: A new dialogue box appears. Click on the “Next” button to continue. (Check the screenshot below)
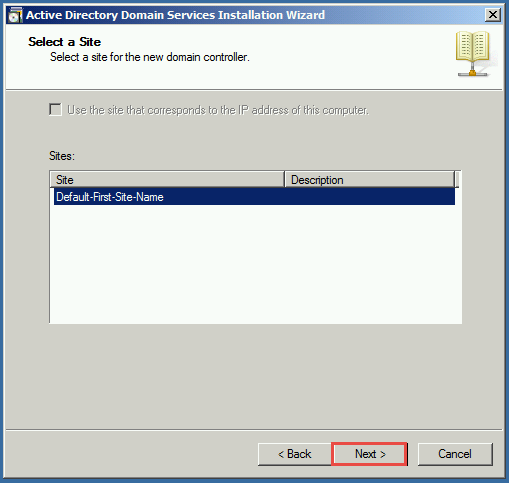
Step 10 : Again, click on the “Next” to enter DNS (Domain Name Server) configuration. (Check the screenshot below)
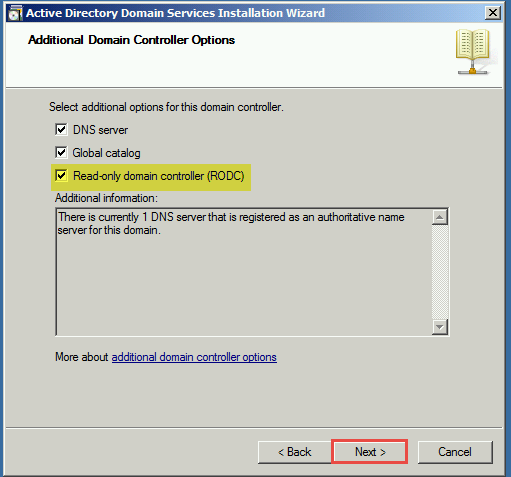
Step 11: “Additional Domain Controller Options” dialogue box will appear on your screen. Select “Read only domain controller” to install RODC .
Step 12: Click on the “Next” button. (Check the screenshot below)
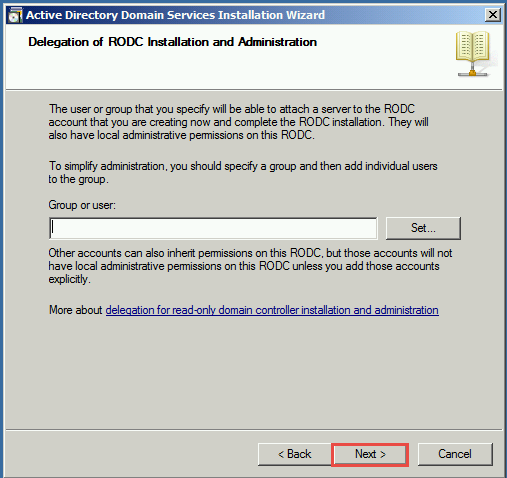
Step 13: In the “Delegation of RODC: Installation and Administration” dialogue box, click on the “Next” button to continue. (Check the screenshot below)
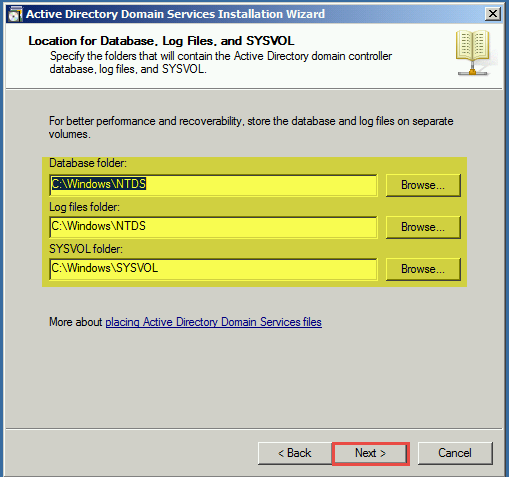
Step 14: When the next dialogue box appears, select the location to store AD Database.
Step 15. Click on the “Next” button. (Check the screenshot below)
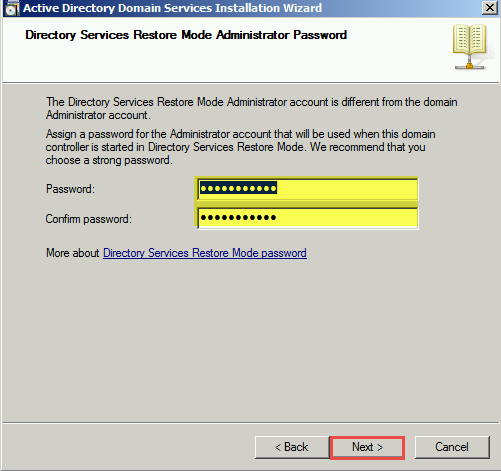
Step 16: Enter “Directory Services Restore Mode Password” in the next dialogue box and click on the “Next” button. (Check the screenshot below)
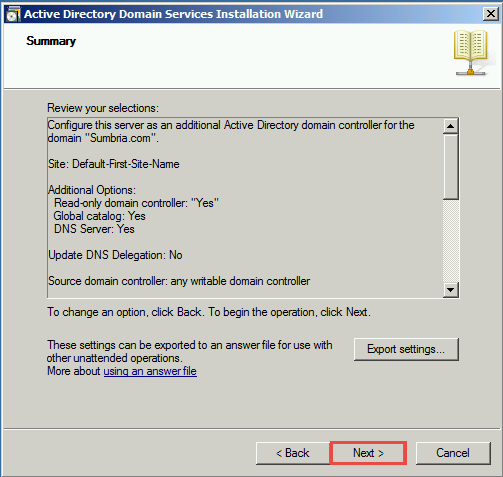
Step 17: Click on the “Next” button on the “Summary” dialogue box. (Check the screenshot below)
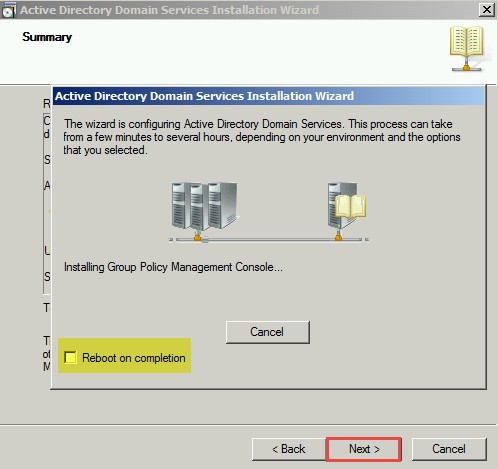
Step 18: In the next dialogue box that appears on your screen, select “Reboot on Completion” option. (Check the screenshot below)
Step 19: After rebooting, your local server becomes a member of domain controller. Enter your login credentials to proceed.
Step 20: You can now see all AD DS services that are available on this server.
Step 21: Now, you have 2 servers in your environment.
If you are having difficulty in following through the steps on how to install read only domain controller in Windows Server 2008, drop your questions/doubts below. A Windows Server 2008 expert will revert with possible solutions at the earliest.


