Internet Information Services (IIS) is a Microsoft service which is used to run websites on the Internet.
IIS is mainly used to create Web Server. A computer system running the IIS service functions as a Web Server. Installing IIS on MS Windows Server 2008 is pretty easy and in this post, we will demonstrate how to do that through easy to follow steps and screenshots.
First things first, the IIS service is also used for creating a website that can be accessed through various means such as the FTP (file transfer protocol), FTPs, HTTP, HTTPs, SMTP and NNTP.
Follow the steps mentioned below to learn how to install IIS (Internet Information Services) on Windows Server 2008:
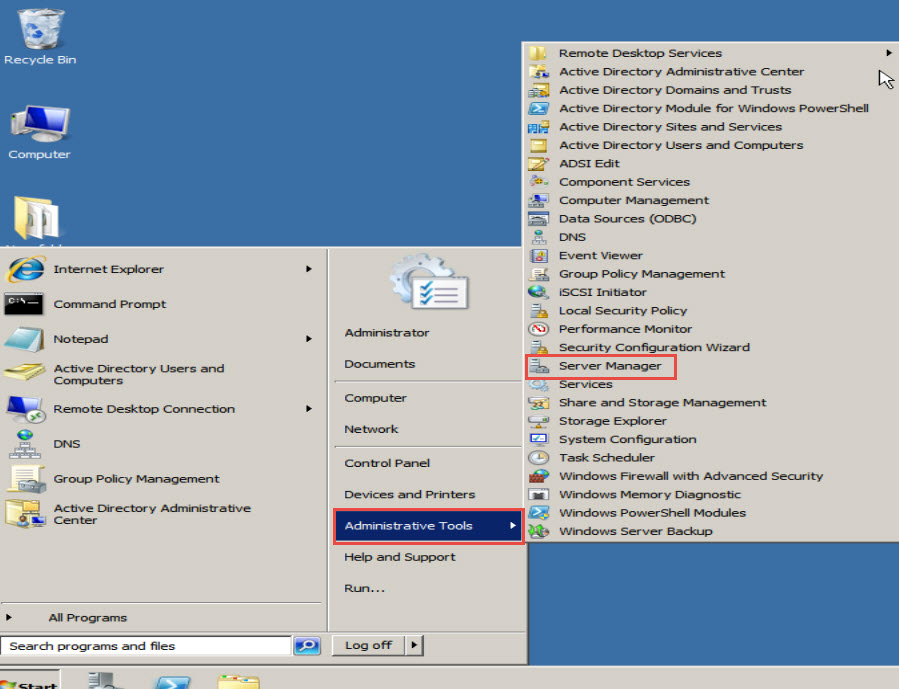
Step 1: To get started, go to the “Start” button.
Step 2: Select the “Administrative Tools” option and click on the “Server manager” option in the dropdown menu. (Check the screenshot below)
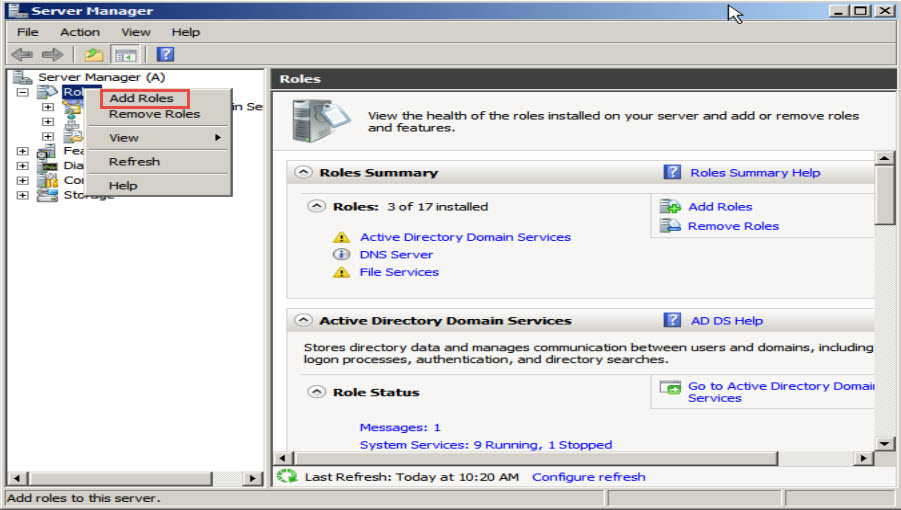
Step 3: The “Server Manager Window” will now appear on your screen. Right click on the “Roles” tab in the left panel of the window.
Step 4: Next, click on the “Add Roles” option in the dropdown menu. (Check the screenshot below)
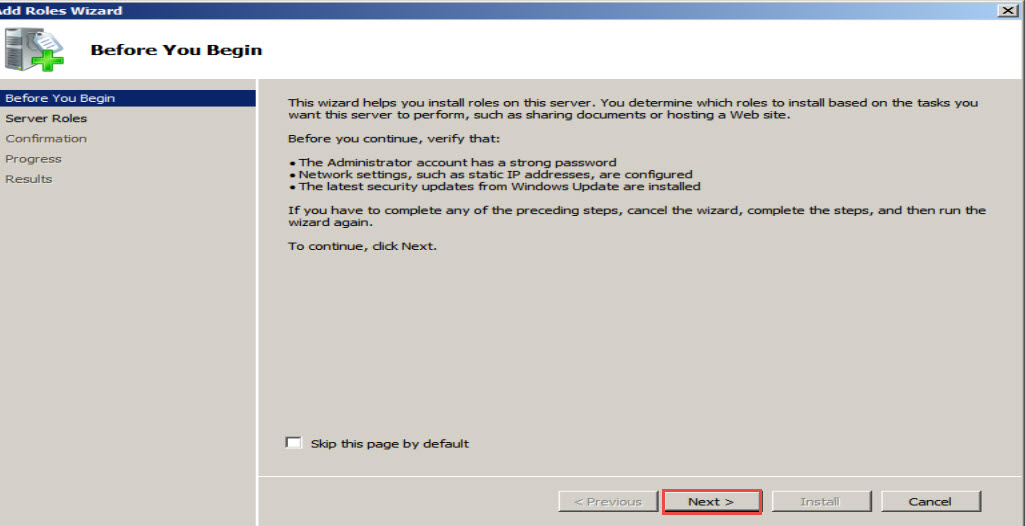
Step 5: A “New Server” Wizard will now load on your screen. Click on the “Next” button to continue. (Check the screenshot below)
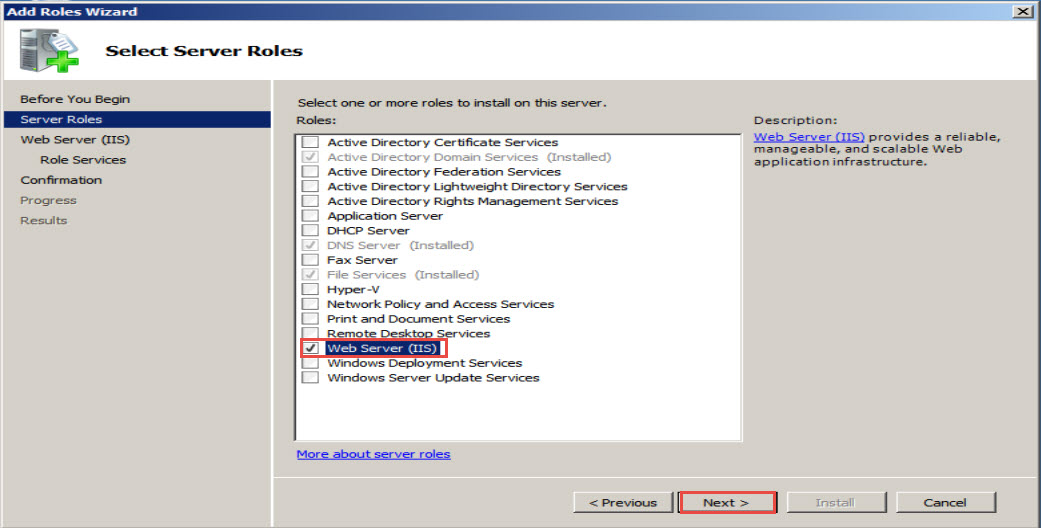
Step 6: Amongst the many roles of the Windows Server displayed on the screen, select the “Web Server (IIS)” option and click on the “Next” button to proceed. (Check the screenshot below)
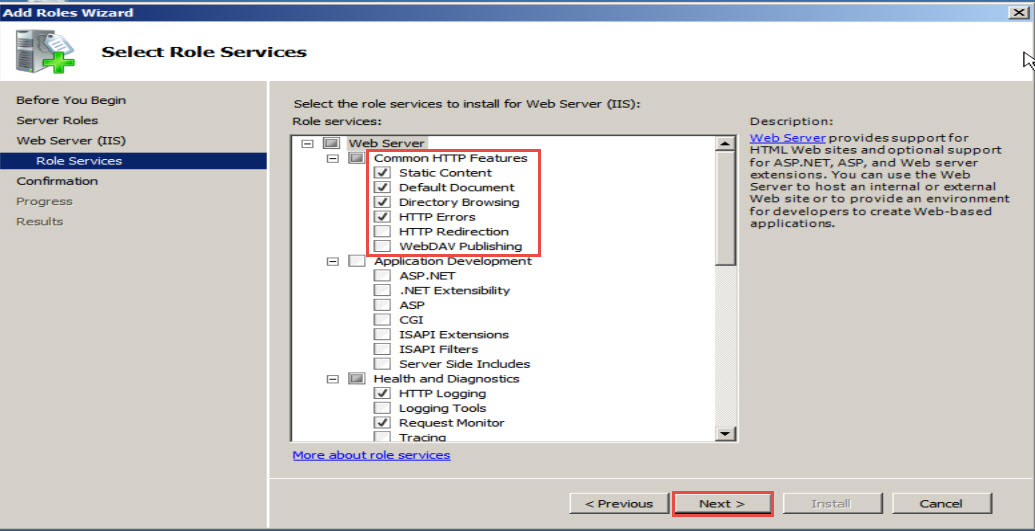
Step 7: In the next window, you will notice that some IIS features have been selected automatically. Click on the “Next” button to continue. (Check the screenshot below)
Step 8: Clicking on the “Install” tab in the next window will install the required IIS server roles there.
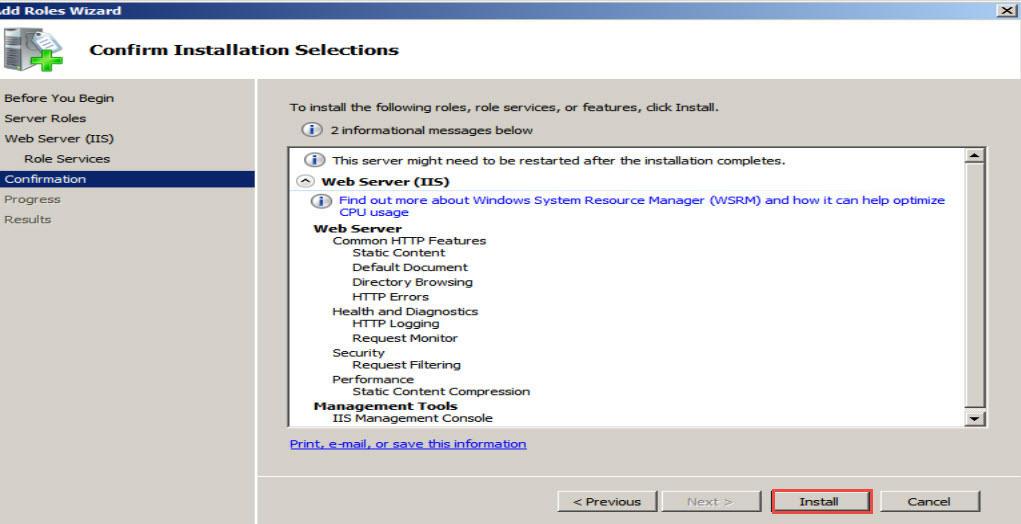
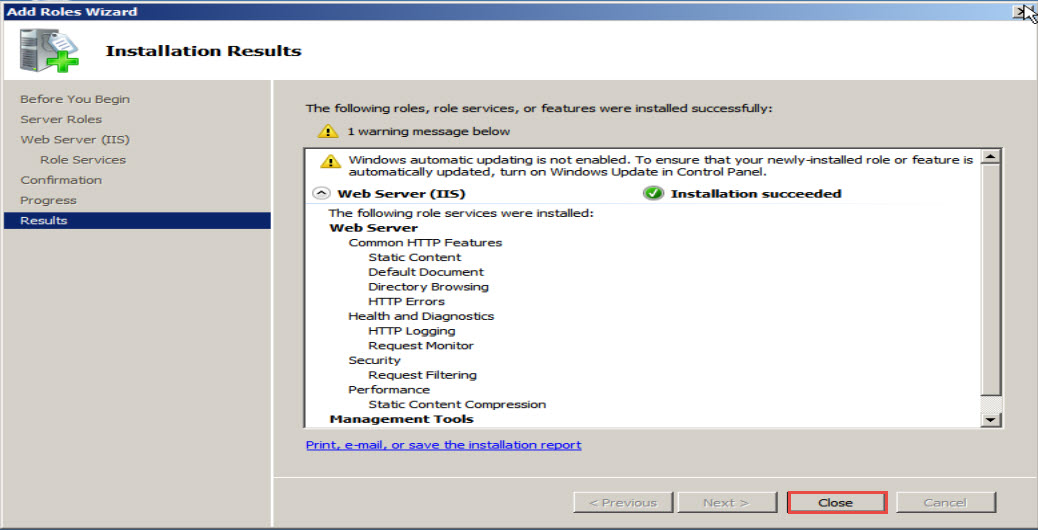
Step 9: Now IIS service has been successfully installed on your Windows Server 2008. Click on the “Close” button for closing the Wizard.
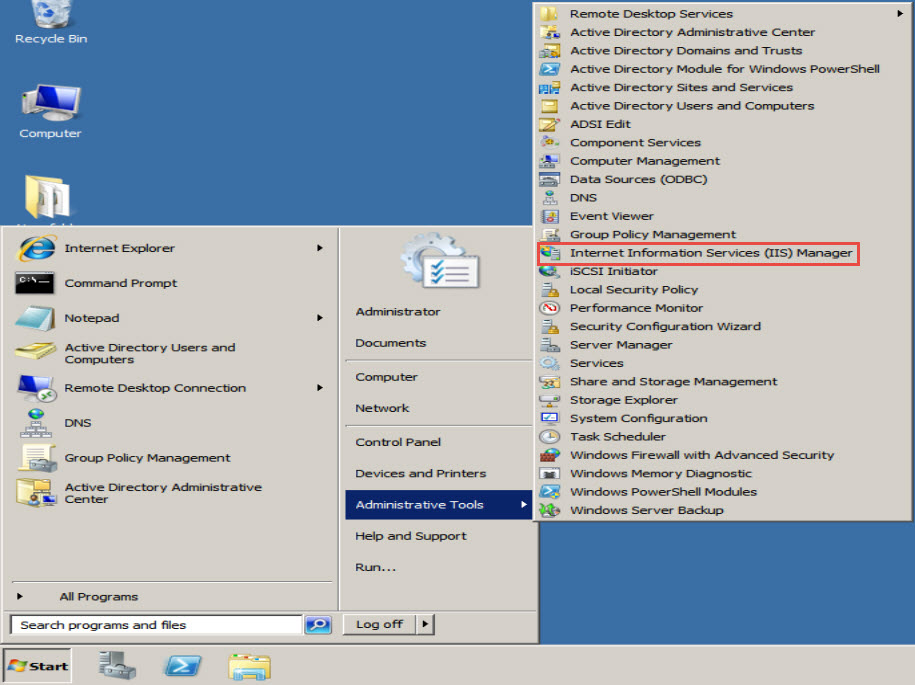
Step 10: Now, to open the “IIS Services Manager,” go to the “Start” button and right click on the “Administrative Tools” option.
Step 11: Amongst the many options that appear in the dropdown menu, click on the “Internet Information Services (IIS) Manager” option. (Check the screenshot below)
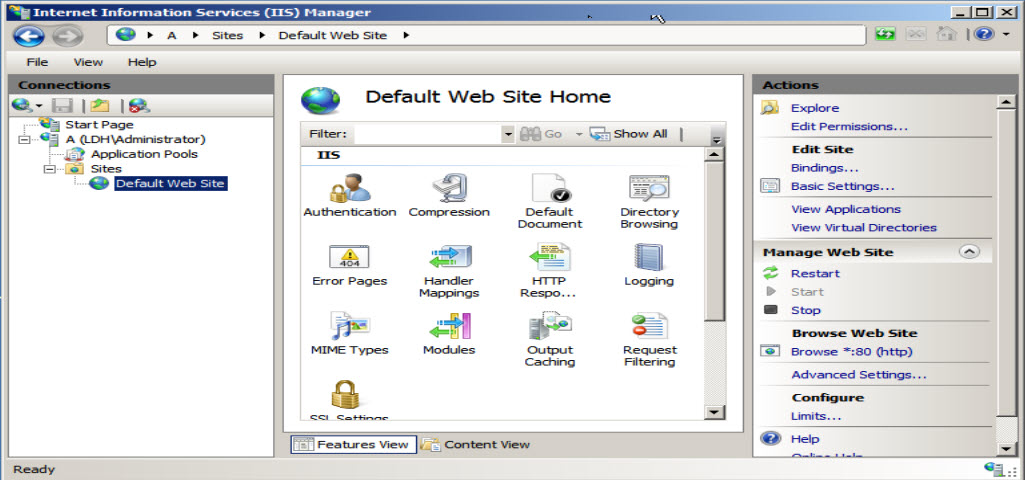
Step 12: the “Internet Information Services (IIS) Manager” window will now appear on the screen. Here, you can create or host new web sites. (Check the screenshot below)
Congratulations!
Were you able to move forward till the last step? Did you face any difficulty while trying to configure IIS or Web Server on Windows Server 2008? If so, please let us know.
Drop your questions/doubts in the comment section below. If possible, please mention the exact problem you faced when trying to install IIS! One of our Windows Server 2008 experts will revert with a detailed explanation at the earliest!


